
Posted on April 5, 2013
Disco duro virtual USB para Apple //cVirtual Hard Drive for Apple //c
Desde que empecé a coleccionar la //c, una de mis molestias es el tener que cambiar discos constantemente. Algunos solucionaron en el pasado con los discos de 800k y eventualmente los discos duros (muy escasos y caros), pero hoy en día eso es simplemente muy poco.
 He encontrado varias opciones al manejo masivo de archivos, algunas de ellas requieren el uso de ranuras y tarjetas de expansión, otras requieren convertir los archivos a un formato propietario para ser leídos. Finalmente hallé un proyecto francés llamado SPVHD (SmarPort Virtual Hard Drive), su creador se baso específicamente en el “SmartPort” de la Apple //c, por lo que funciona de maravilla en mi máquina.
 Después de mucho investigar finalmente decidí adquirir el kit, que tardo un par de semanas en legar desde Europa. Inicialmente había pensado armarlo todo desde cero, pero cuando quise comprar el controlador Micropendous, me di cuenta que es muy escaso y luego de semanas infructuosas, simplemente lo ordené de Francia.
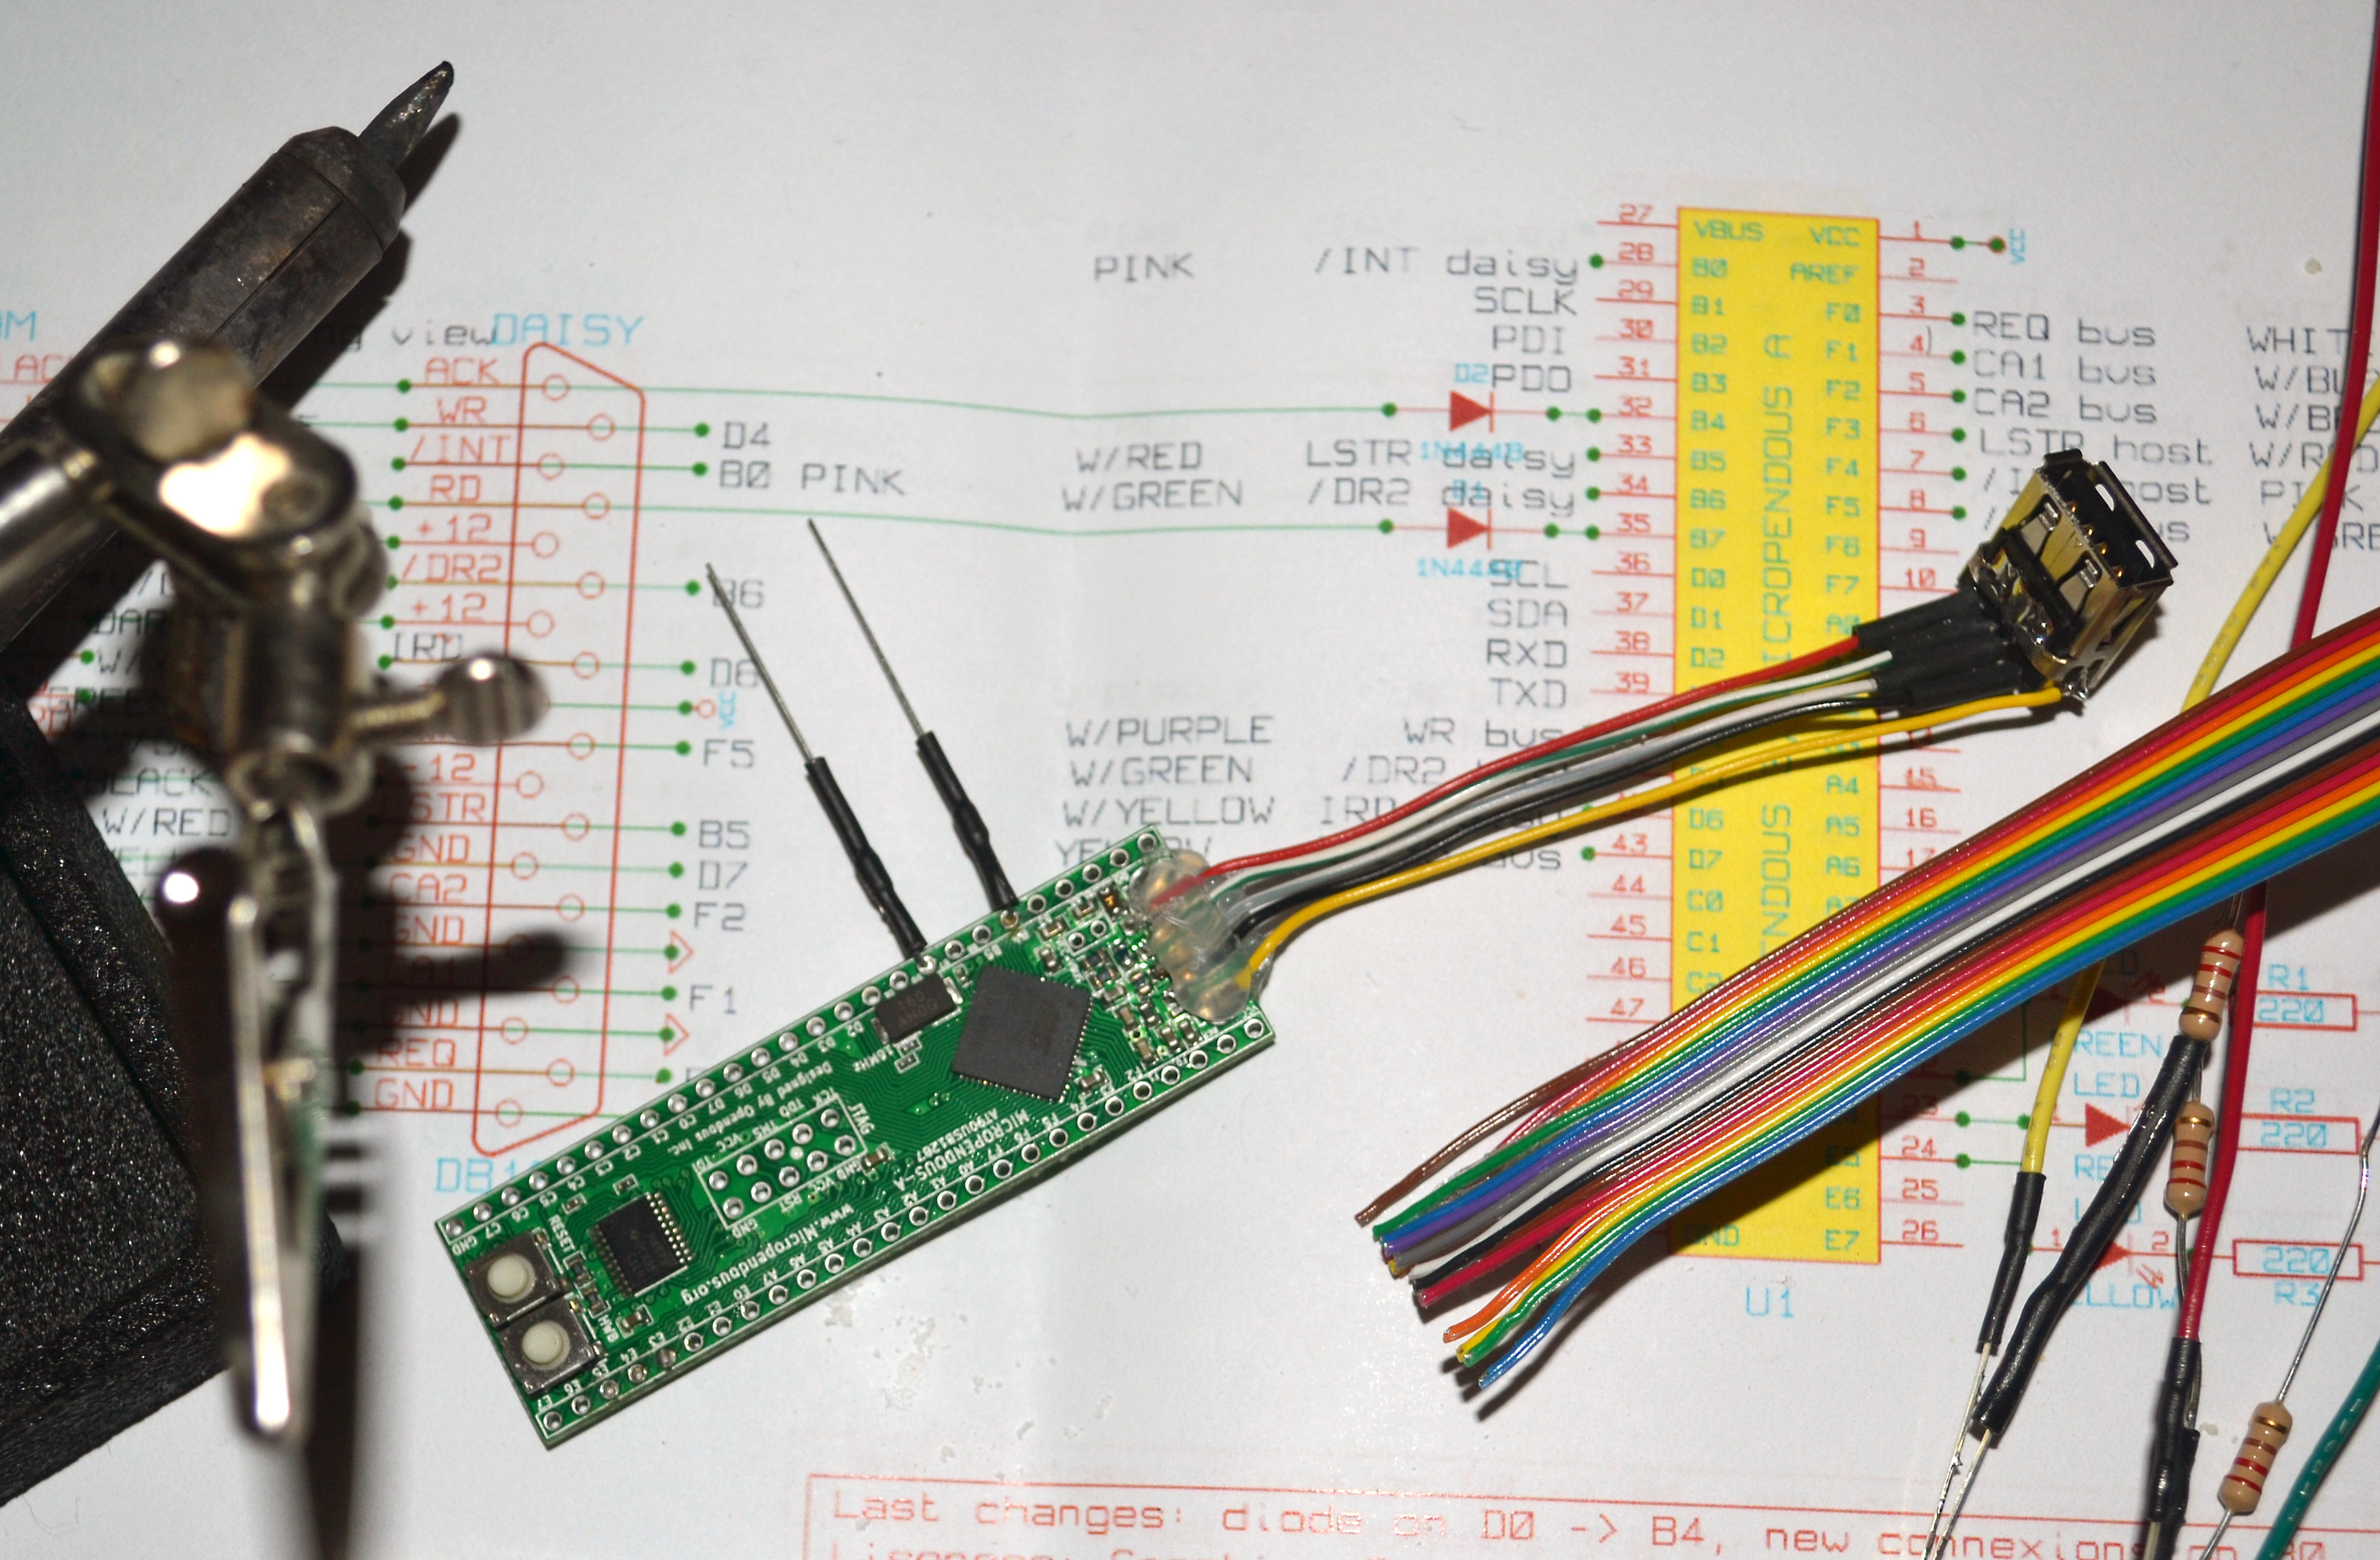
las piezas necesarias para ensamblarlo son:
- Uns tarjeta Micropendous-A con conexión hembra USB
- Un LED Rojo
- Un LED verde
- Un LED Amarillo
- Tres resistores de 220 ohms
- Dos diodos 1N4448
- Un conector DB19 hembra y un DB19 macho
- Mucho cable para las conexiones
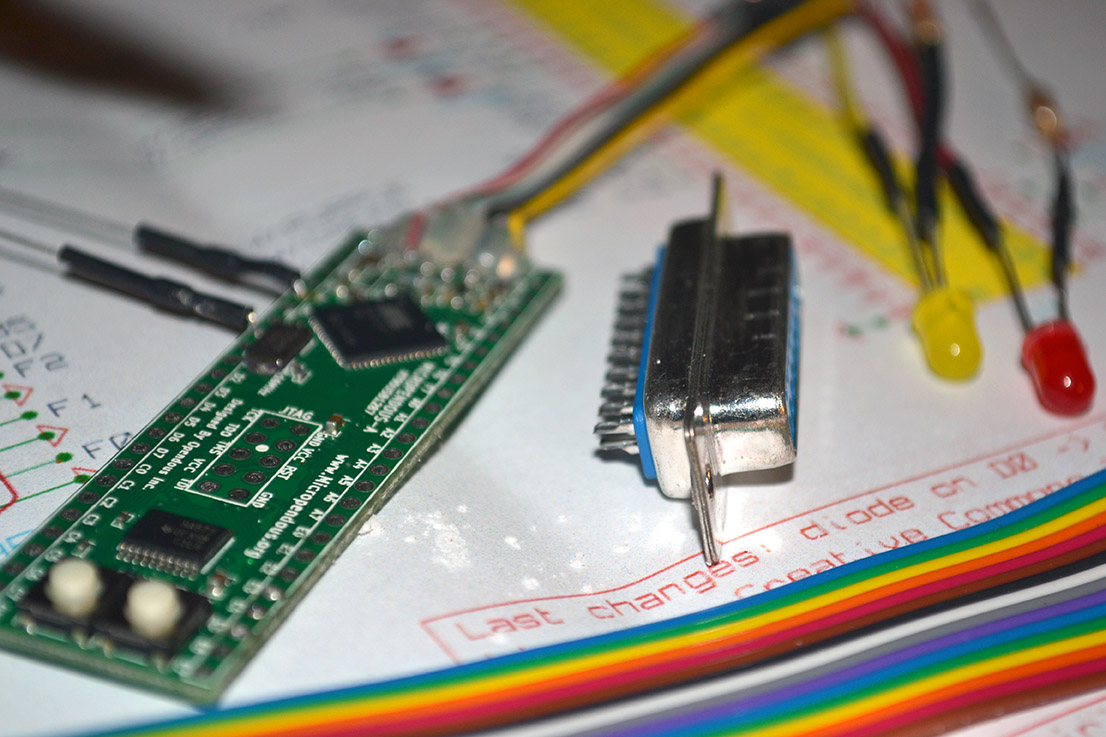
Para la primera versión “cruda” es lo que se le llama “prueba de concepto” o un ensamblado rápido para ver que funcione. Fueron horas de meticuloso soldado y conexión, pero al final funcionó.
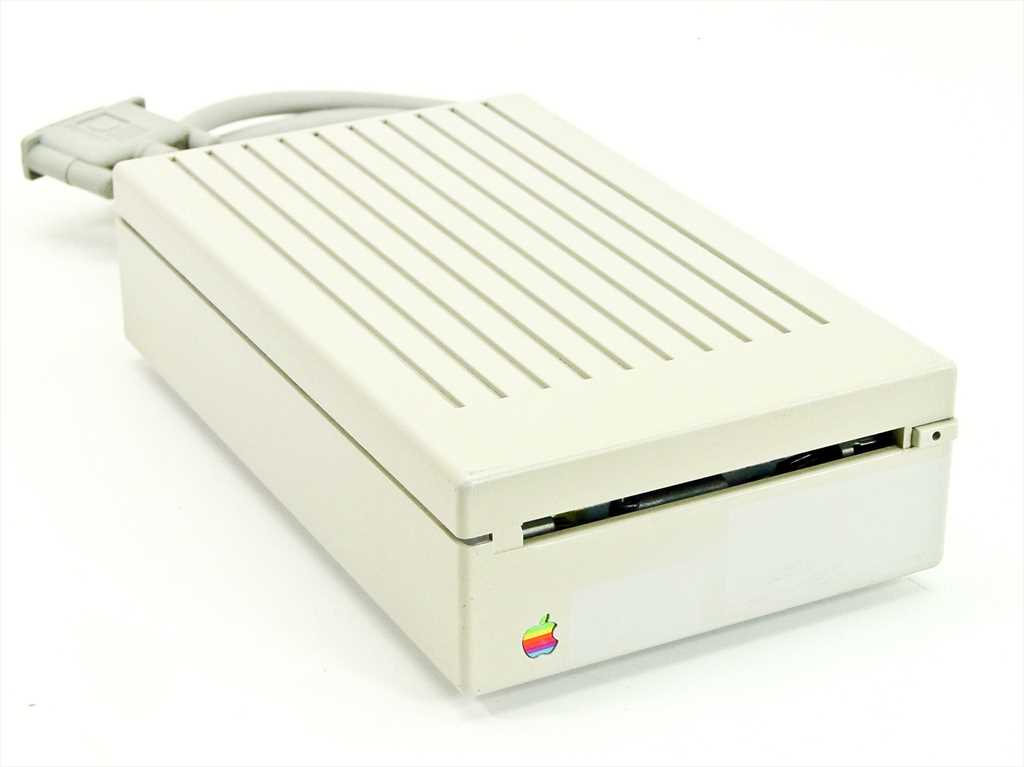 El siguiente paso es comprar un disco 3.5 externo de Apple IIe (A9M0106) por unos pocos dólares, vaciarlo u adaptarle los electrónicos dentro, junto con los LEDs para que quede como un disco más – lo mismo que hice con el monitor – obteniendo un disco moderno con toda la forma visual del original.
Aquí un video de el drive funcionando. Nótese que ninguno de los drives tiene disco insertado:
http://vimeo.com/63433222Since I started Apple //c collection, one of my “pet peeves” has always been the constant changing of diskettes. Some people solve it by changing to 80k floppy drive units and eventually, hard drives (these last ones very hard to find and expensive). These days that is simply too small anyway.
I have investigated and found some options for massive file management, some of them require the use of slots and expansion cards. Other require converting the files to proprietary formats to be read. Finally I found a french project called SPVHD (SmarPort Virtual Hard Drive). Its creator based the design specifically on the Apple //c SmartPort, which is why it works marvelously on my computer.
After lot o research finally decided to buy the kit, which took a couple of weeks to arrive from Europe. Initially I thought of putting all together by myself, but realize that the Micropendous A board is really very difficult to find, after weeks looking for it everywhere.
The required pieces are:
- One Micropendous-A card with USB female connection
- One red LED
- One green LED
- One yellow LED
- Three 220 ohm resistors
- Two diodes 1N4448
- One DB19 female and male connectors
- Lots of cable
For th first “dry run” or also called “proof of concept”I did a quick assembly to make sure it worked. Took hours of meticulous soldering and connecting, but at the end it worked.
The next step will be to buy a cheap 3.5 external floppy drive to fit everything inside – just like I did with the monitor – keeping the same vintage look with a great storage solution.
Here is a video of the drive working. Note that none of the drives have discs inserted:
http://vimeo.com/63433222
Posted on April 2, 2013
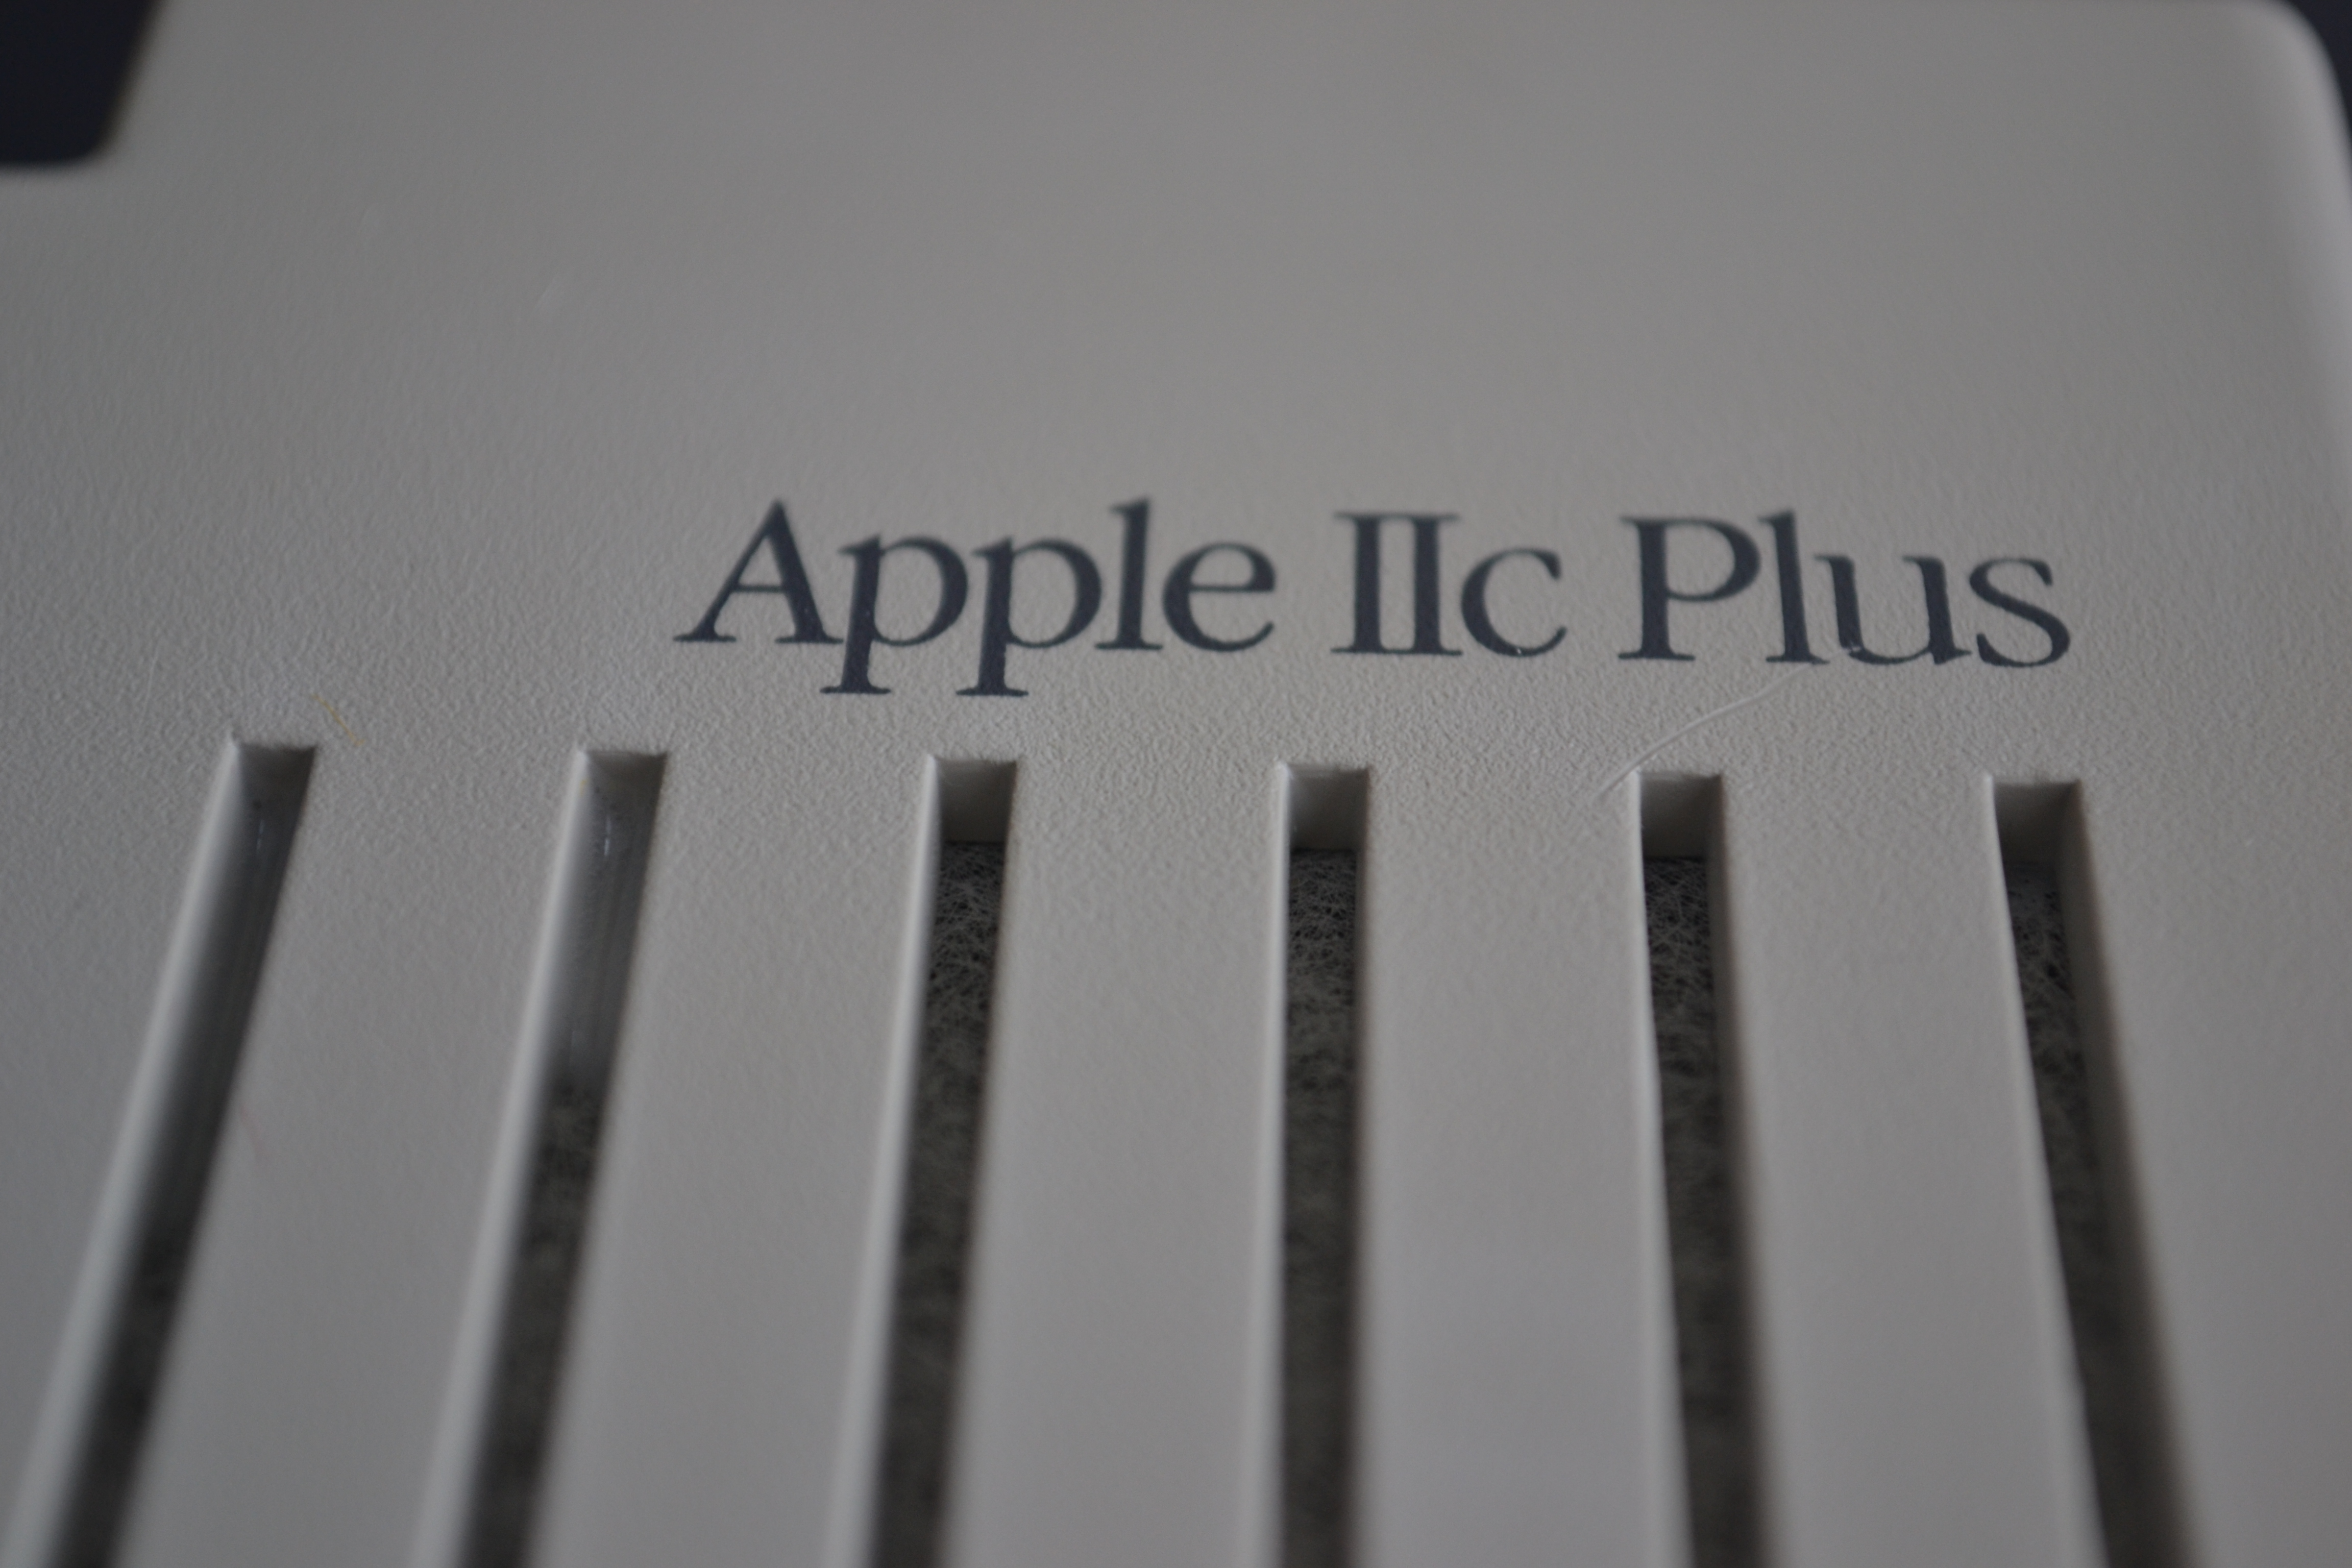
El nuevo juguete: Apple //c plusThe new toy: Apple //c plus
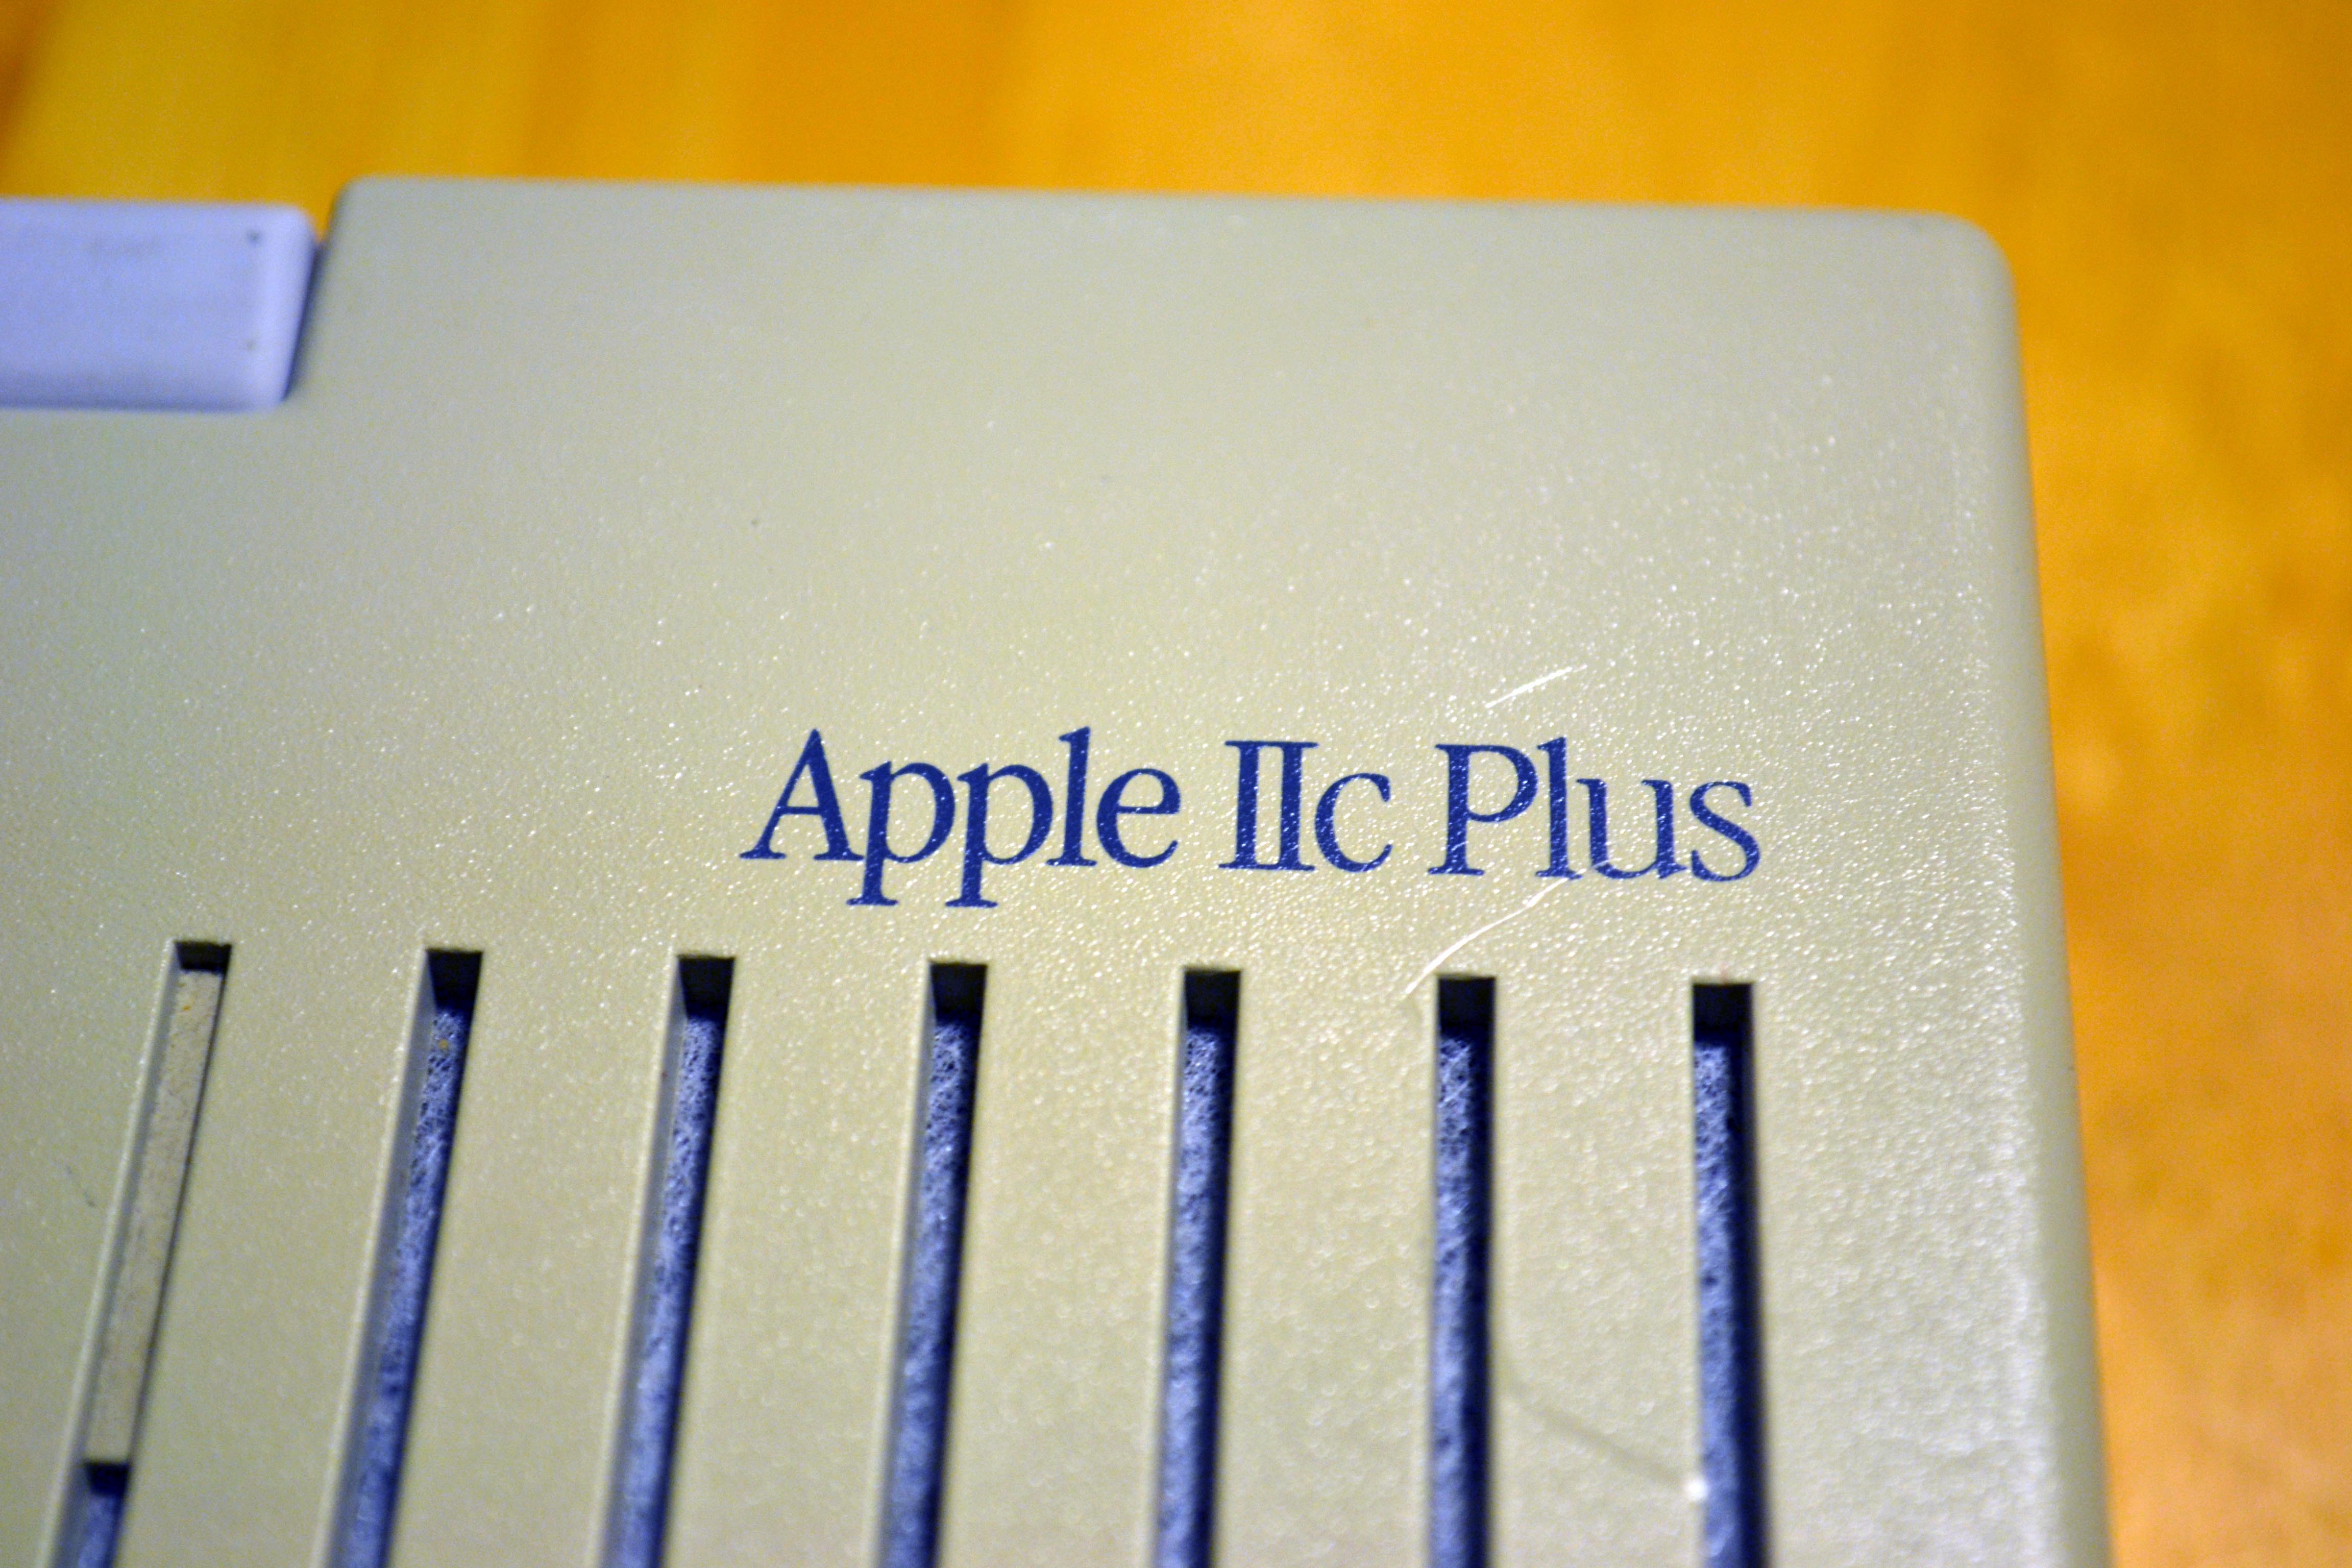
A mediados de los 80’s y principios de los 90’s, las Apple IIc fueron muy populares por su tamaño, diseño y funcionalidad, pero con la salida de la Macintosh y la Apple II GS, los altos mandos de Cupertino decidieron mejorar el modelo añadiendo mayor capacidad con un disco interno de 3.5″ de 800k, un procesador de 4 Mhz, y fuente de poder integrada (no mas “ladrillo con correa” como llamaban a la fuente de poder externa).
 Como este modelo es poco común, mas caro, difícil de encontrar, no me había hecho de uno. Aparte al ser el procesador más rápido, los los juegos son prácticamente inútiles, y hay que instalar un disco externo de 5.25 pues todos los programas vienen en ese formato.
Por fin alguien en un foro me ofreció una //c + a un buen precio, y rápidamente me hice de ella. Cundo llegó estaba totalmente amarilla, y bastante sucia, se ve que la tenía arrumbada.
Aquí unas fotos del antes y después:
 |
 |
 |
 |
 |
 |
Estoy muy contento con mi nuevo juguete. Es muy rápida, la calidad es excelente, el teclado distinto al de la //c, y ahora tengo dos máquinas para experimentar.
 In the mid ’80s the Apple //c were at their height of their popularity. Their size, design and all in one functionality gave them an edge, but with the arrival of the Macintosh and the Apple IIGS, the management team at Cupertino decided to enhance he model adding higher drive capacity (800k 3.5 disk) and a faster processor (4 Mhz) plus adding the power supply internally, no more “brick on a leash” as they called it.
Because this model is scarce and expensive, I had not bought one. Also one if its drawbacks was the enhanced speed that made the games practically unplayable, and all the games come in 5.25 disks so also needs an external floppy drive.
Finally somebody offered me a //c+ at a great price, and quickly i acquired it. When it arrived, it was completely yellow and really dirty, i think the previous owner had it stored.
Here are some Before and after Photos:
|
|
|
|
|
|
I’m very happy with my new toy. It is really fast, excellent quality, a different keyboard style and best of all, I have two computers to experiment with.

Posted on March 22, 2013
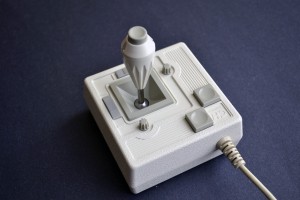
Mouse //cMouse //c
 Cuando inicié mi colección de Apple //c, mi intención principal era la de tener un “set” completo del equipo y con el mismo diseño y color. Poco a poco he añadido impresora, joystick, discos externos y hasta módem. El ratón o “mouse” es una pieza un poco complicada: Apple ofreció durante algún tiempo distintos modelos de ellos con la //c, en muchos anuncios, mostraba varios modelos como parte del equipo. esto hizo mas difícil el identificar un solo modelo como el específico de la //c.
Apple sacó dos modelos de mouse para la //c: el A2M4015 que es de color beige, y el A2M4035 de color platino, llamado Mouse IIc.
 Es un poco confuso pues la caja del A2M4015 dice Mouse IIc, pero en la etiqueta del mismo solo muestra el número de modelo, sin embargo en el A2M4035 el texto “Mouse IIc” es prominente.
Por algún tiempo tuve un A2M4015, pero el color no me convencía, beige no se lleva muy bien con el platino de la //c. Por fin conseguí el preciado ratón, y vendí el beige.
Este ratón se ve mejor y va mas acorde, aunque el botón pequeño parecido al M0100 parece mas un paso atrás que adelante.When I started my Apple //c collection, the main intent was to have a full set of the model with the same design and color. Gradually I added a printer, joystick, external floppy drives and even a modem.
The mouse itself is somehow a complicated piece: Apple for some time offered different models with the //c, showing different models in different ads. This made it hard to identify a single specific model for the //c.
Apple has specifically two mouse models for the //c: A2M4015 that is beige, and platinum color A2M4035 called Mouse IIc.
This makes it little confusing because the box for the A2M4015 says Mouse IIc on top, but on the product label shows only the model number, compared to the A2M4035 which displays “Apple® Mouse IIc” prominently on the label.
For some time I had an A2M4015, but the color did not convince me, beige does not go with the platinum //c. Finally I was able to get the precious mouse, and sold the beige.
This mouse looks better and is more consistent, although the small button just like the M0100 seems to me more like a step back than forward.
Posted on March 22, 2013
Joystick Mach IIIJoystick Mach III
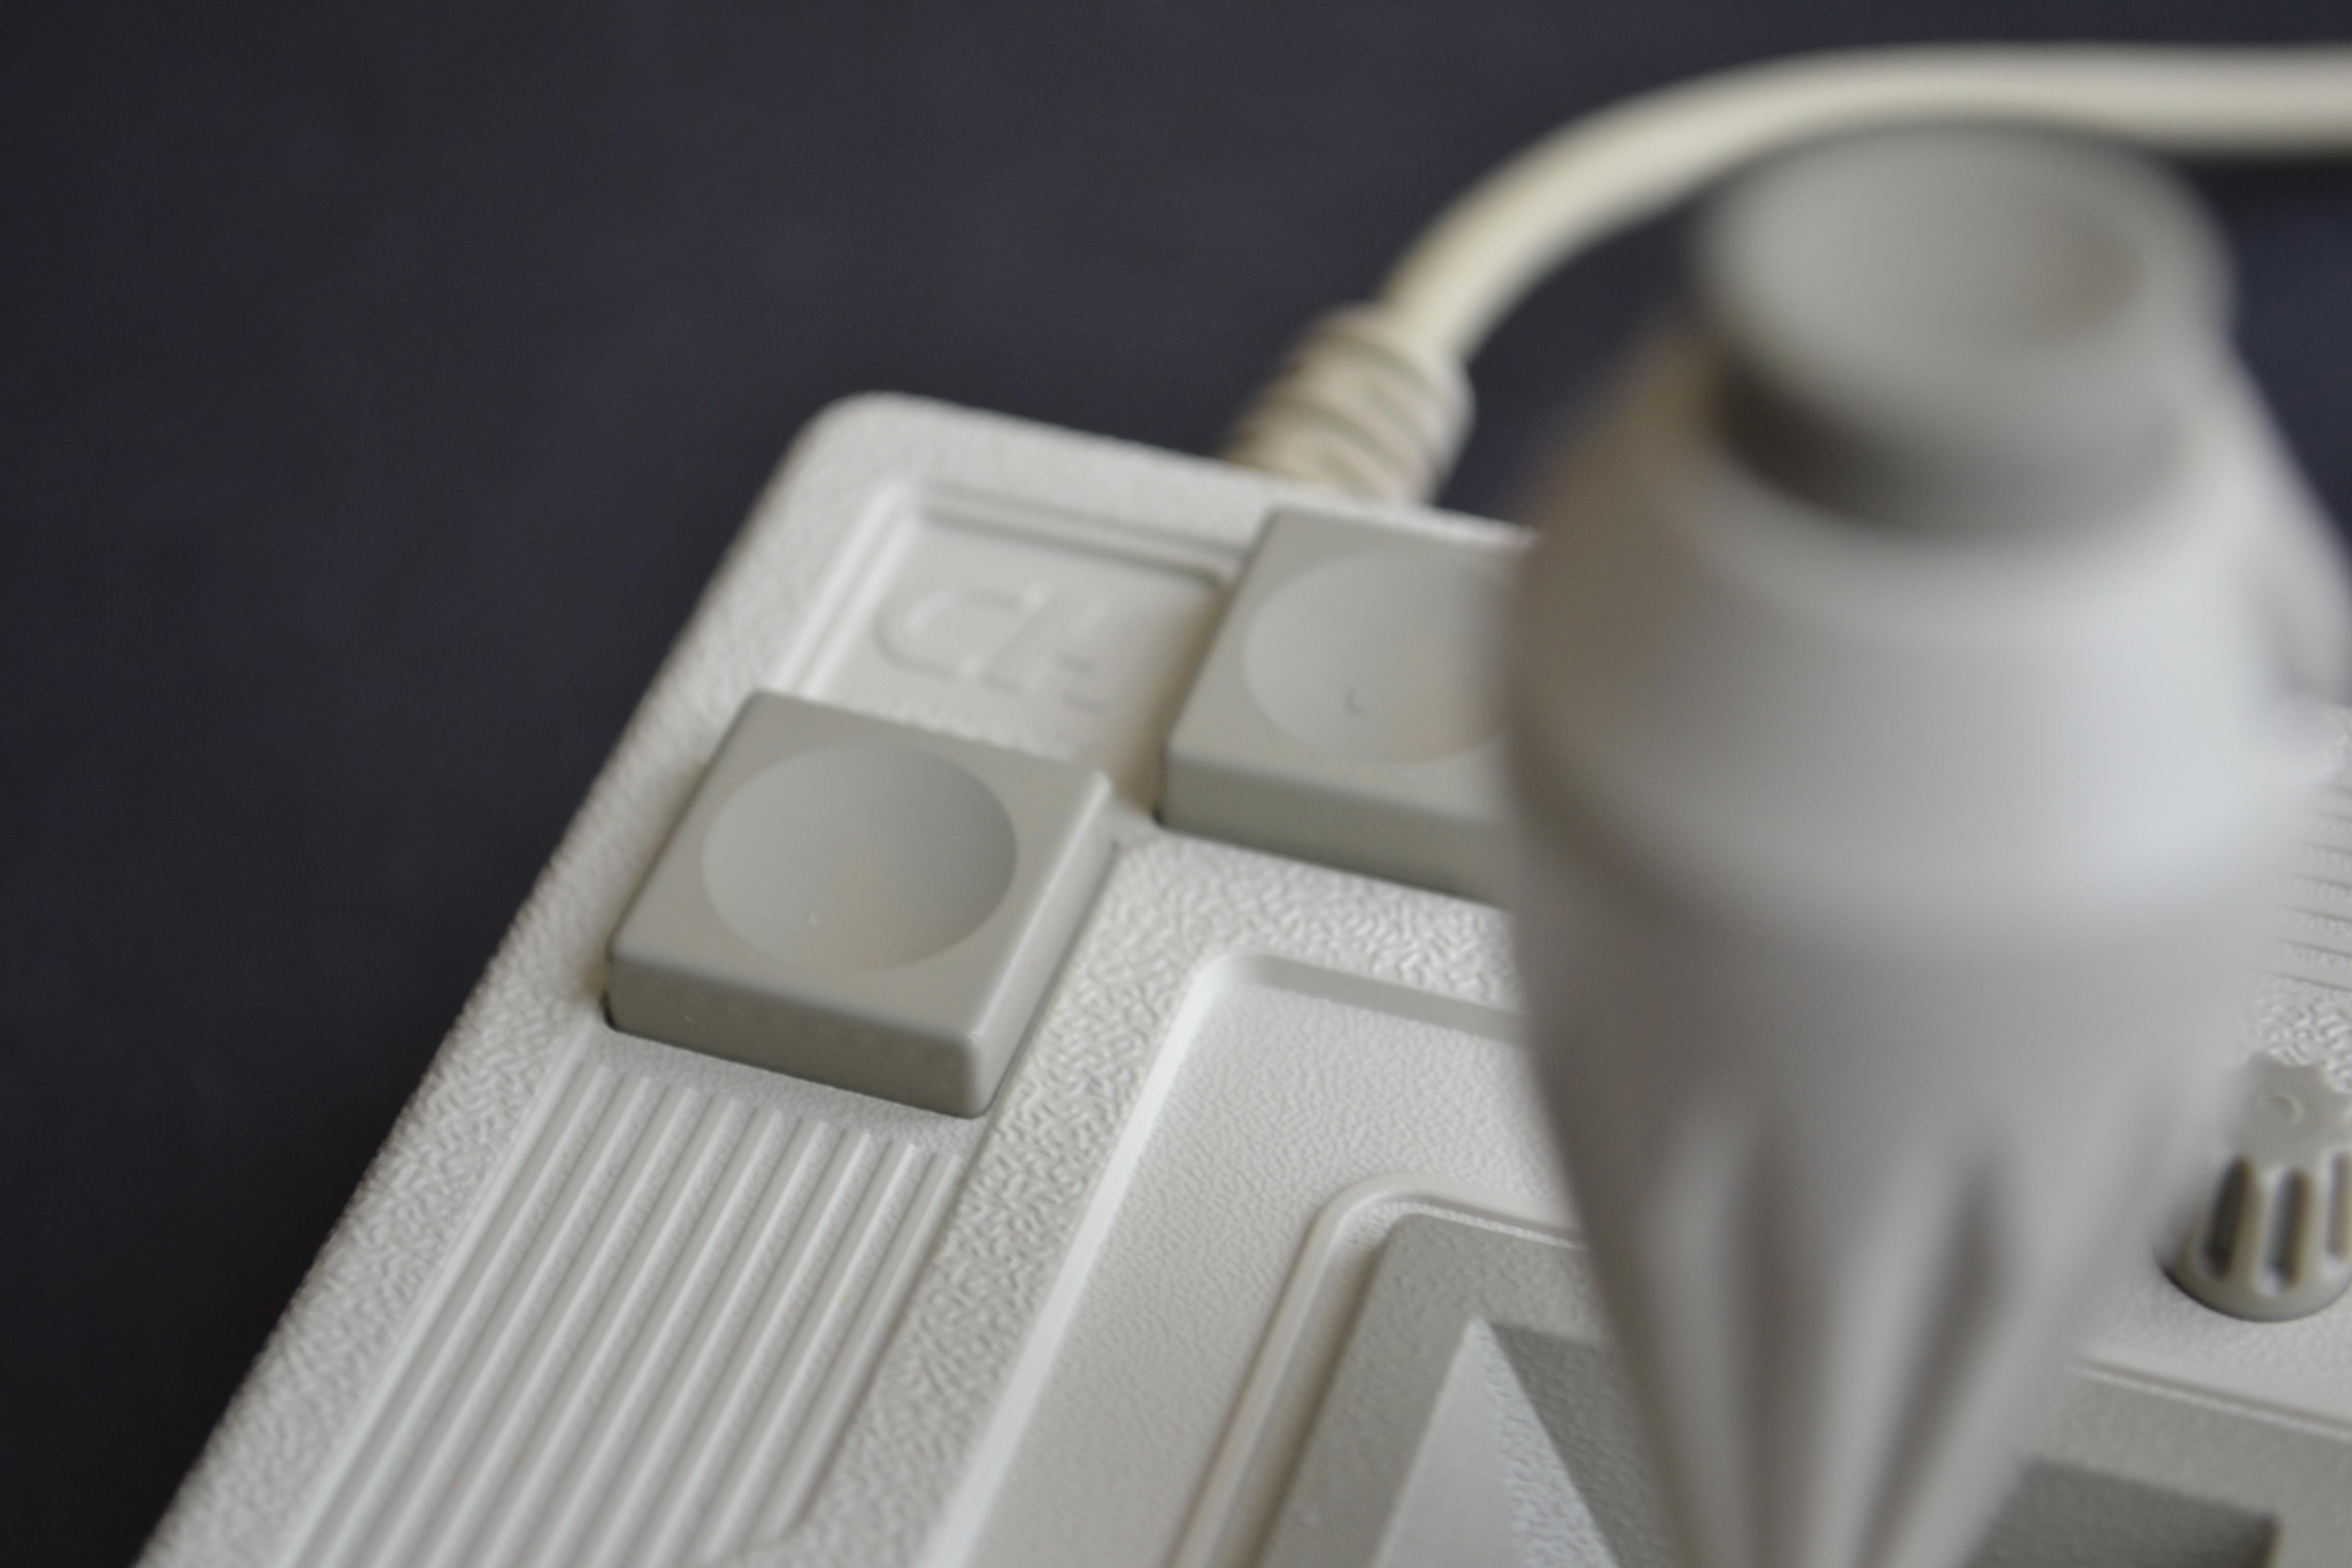
 Uno de los controladores o Joysticks mas emblemáticos de la época de Apple II era el Mach III, inclusive hoy en día aparece en un anuncio de Karateka, al lado de la emblemática Apple II. Una de las características que hacia sobresalir al Mach III era el botón sobre el bastón de control, la capacidad ajustar los controles y el poder desbloquear el bastón para que no se auto-centrara, cosa bastante útil en muchos juegos de acción.
 A lo largo de los últimos meses he comprado, reparado y vendido algunos joysticks, desde el tradicional Apple Joystick hasta el Mach II y Mach III tanto para PC como Apple.
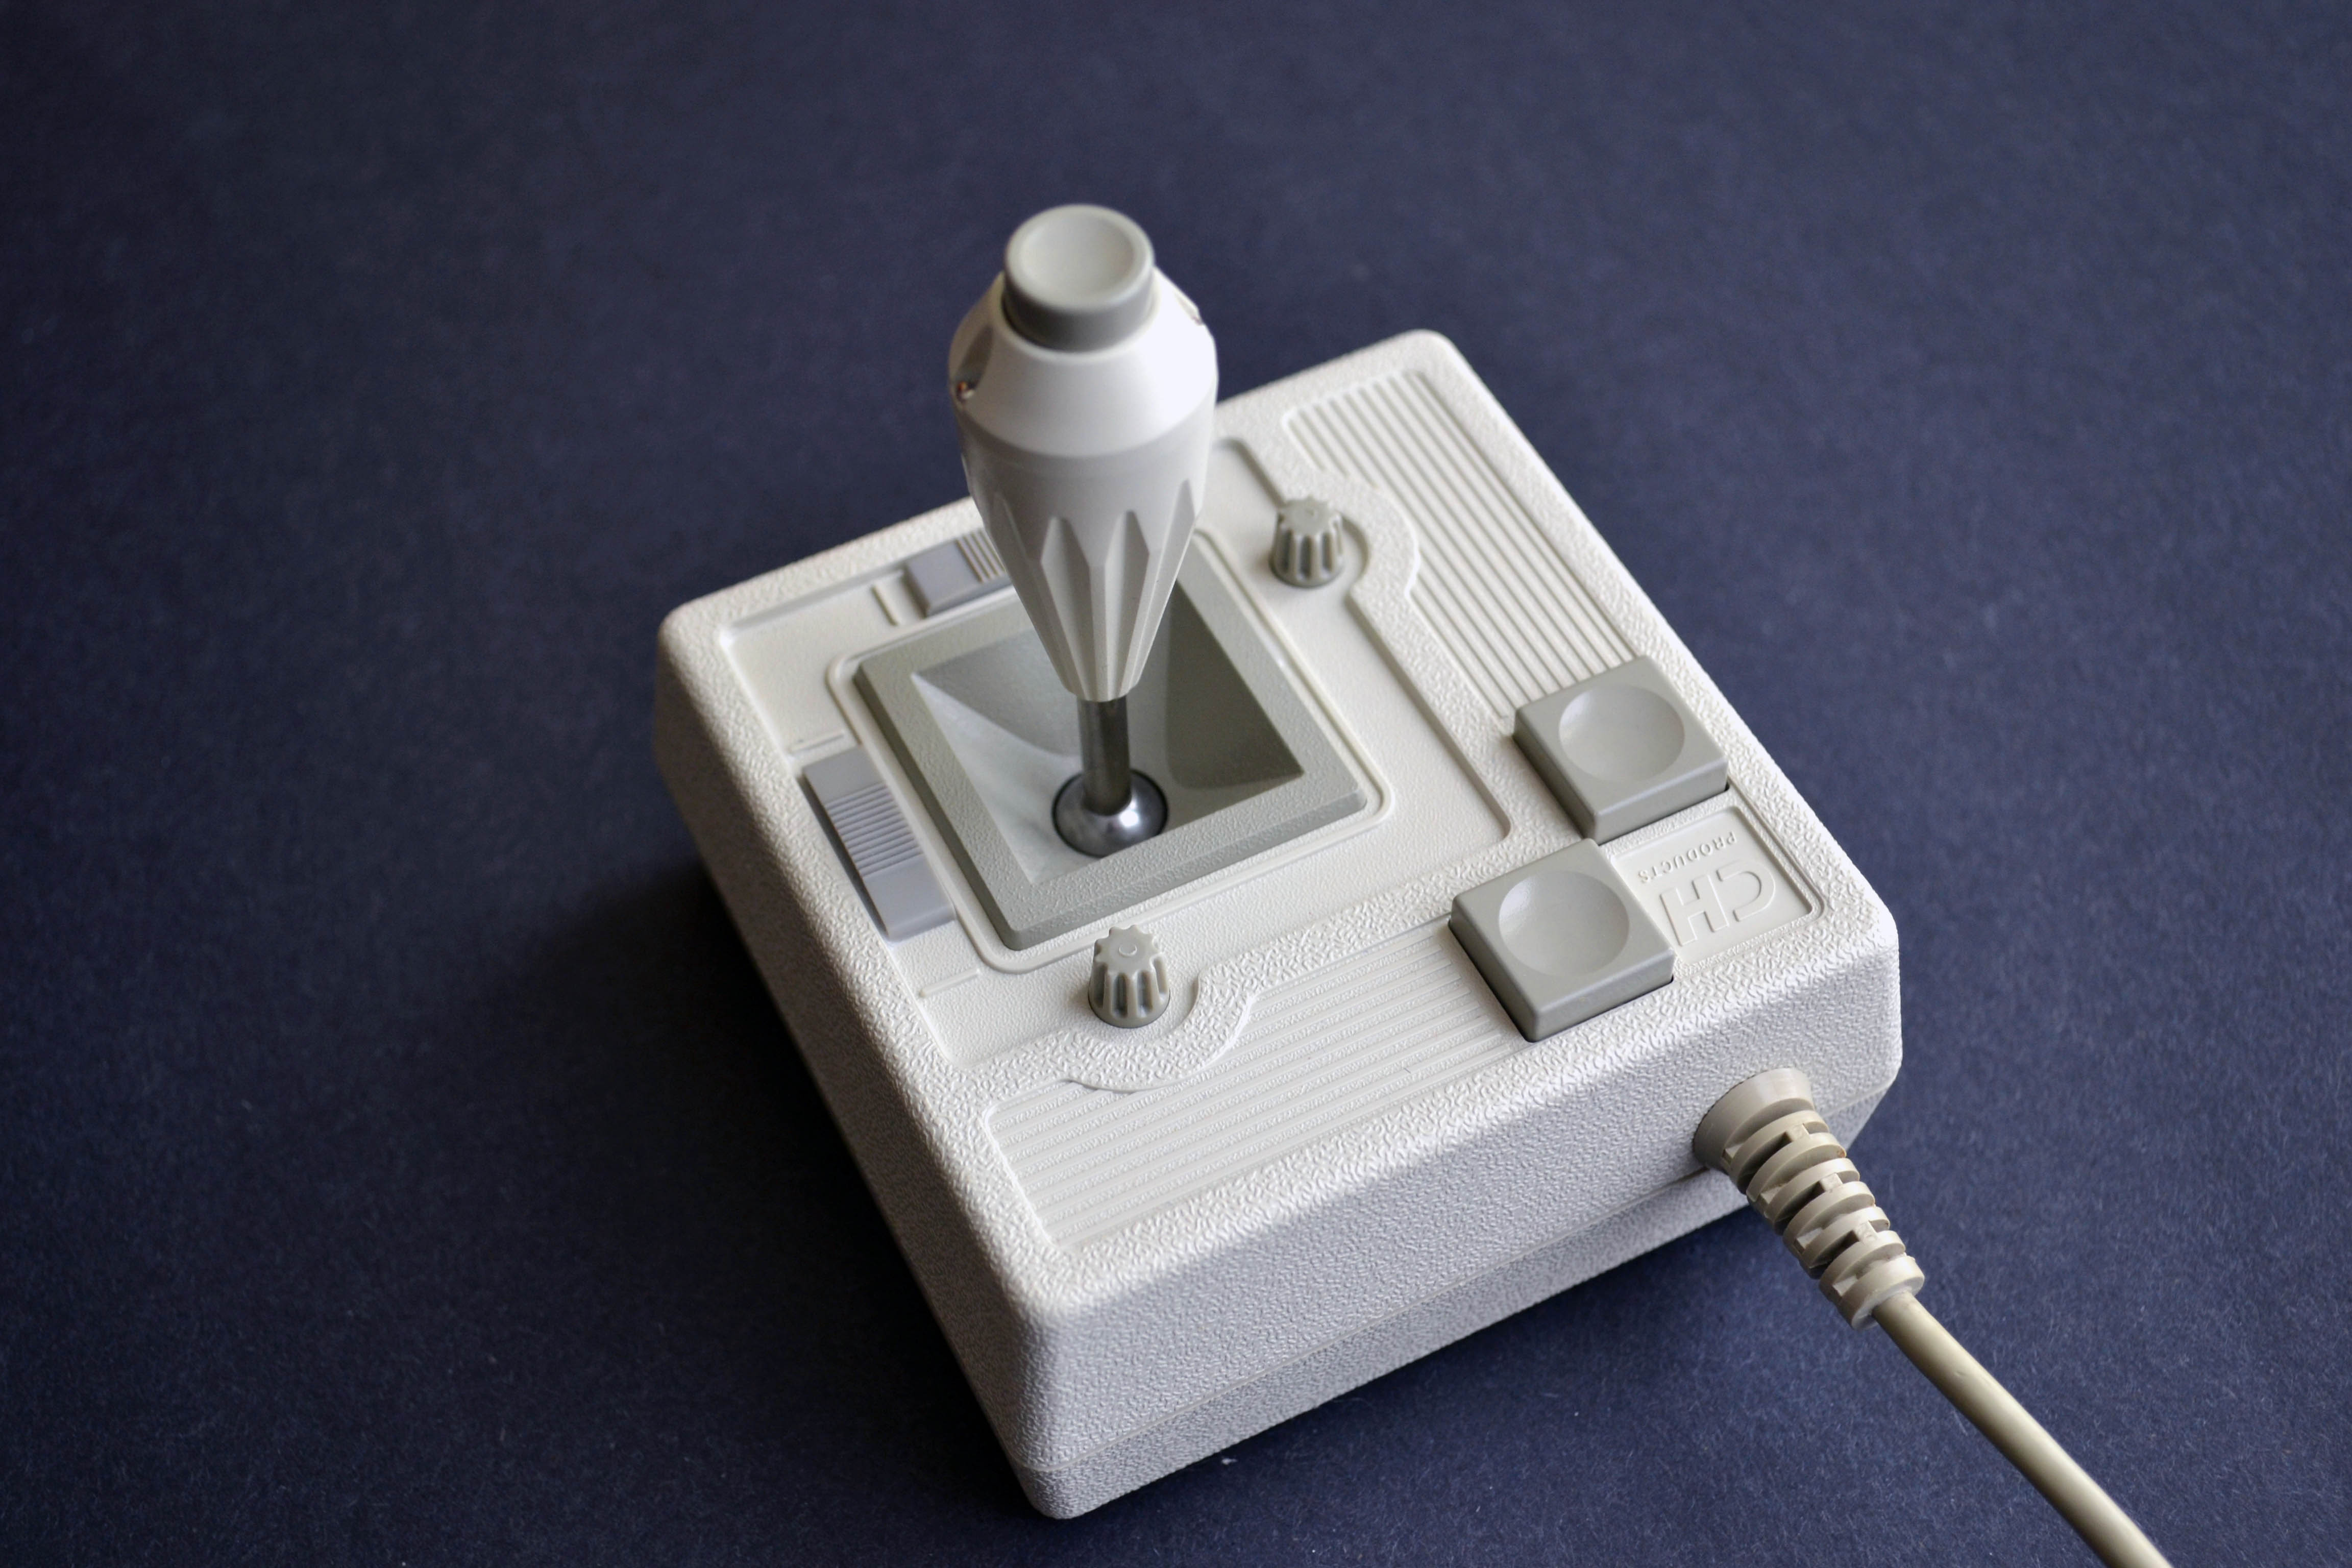
Buscando entonces añadir este excelente controlador a mi colección, me dediqué a buscar una pieza bastante escasa: la versión blanca de el Mach III.
Este joystick es bastante raro, y mucho más la versión para Apple II. Después de varios meses de búsqueda, por fin lo encontré, y como siempre, la limpieza y restauración me permitió obtener una pieza digna de la Apple //c, con los mismos tonos y colores.

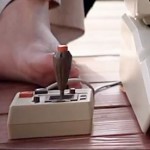 One of the most emblematic Joysticks of the Apple II era was the CH Products Mach III, even nowadays still appears in some advertisements like the one for Karateka, next to the iconic Apple II.
One of the remarkable features of the Mach III was the fire button at the top of the stick, the calibration dials and the ability to unlock the stick auto center, which is quite useful in many action games.
Over the past year I have bought, repaired and sold several joysticks, from the traditional Apple Joystick to the more advanced Mach II and Mach III for both PC and Apple.
Looking to add this excellent device to my //c collection, I searched for a fairly scarce piece: the white version of the Mach III.
This joystick is quite rare, and more for the Apple II model. After several months of searching, I finally found it, and as always, the cleaning and restoration allowed me to get a piece with the same color scheme, fitting perfectly within my collection.
Posted on January 13, 2013
Updating ROM and memoryActualizando memoria y ROM
hoy en día hablar de Megahertz, Megabytes e inclusive Terabytes en computadoras es algo cotidiano, sin embargo treinta años atrás las computadoras de 1 MHz y 128 Kilobytes (¡si, Kilobytes!) eran la norma, y las actualizaciones no eran tan fáciles, sobre todo en equipos portátiles como la Apple //c.
Leyendo un poco sobre su historia, aprendí que hubo varias actualizaciones no solo a la tarjeta madre, sino al ROM, primero para acceder al UniDisk y luego para poder leer la memoria extendida, que podía ser desde los 256k hasta 1 Megabyte.
No solo Apple ofrecía tarjetas de memoria, de hecho Applied Engineering creó un con reloj, CP/M y memoria, pero hoy en día estas tarjetas son muy difíciles de encontrar.
Una de las expansiones de memoria más escasas es precisamente la que ofrecía Apple, y hoy en día encontrar una es realmente difícil.
 Por eso conversando en un foro de computadoras retro, supe de una persona que tenía una tarjeta de expansión para apple //c extra, y lo convencí de vendérmela, de hecho a un muy buen precio. A la vez, me enteré que la versión del ROM de mi tarjeta madre era el 3, y existió una actualización que arreglaba algunos problemas con la memoria extendida.
El problema es que no se pueden pedir estos ROMs a Apple, ni están a la venta en ningún lado, por lo menos oficialmente. Existe un sitio Reactive Micro que los vende, pero al parecer ya no tienen en existencia.
Después de mas investigaciones encontré las imágenes de los ROMs en un sitio Neozelandés, y por medio de una empresa canadiense, EPROMPro – conseguí que me ¨quemaran¨ el ROM en el chip correspondiente.
Por fin me llegó, y temerosamente lo instalé: considerando que proviene de un sitio Neozelandés no autorizado, y la persona que “quemó” el ROM no tiene forma de probarlo, estoy arriesgando el descomponer o incluso inutilizar la computadora.

El ROM versión 4: corrección a la expansión de memoria
Reemplacé el original, versión 3.

Insertado y listo para probarse.
La prueba de fuego: Escribir “PRINT PEEK(64447)” y según el número que despliegue es la versión.

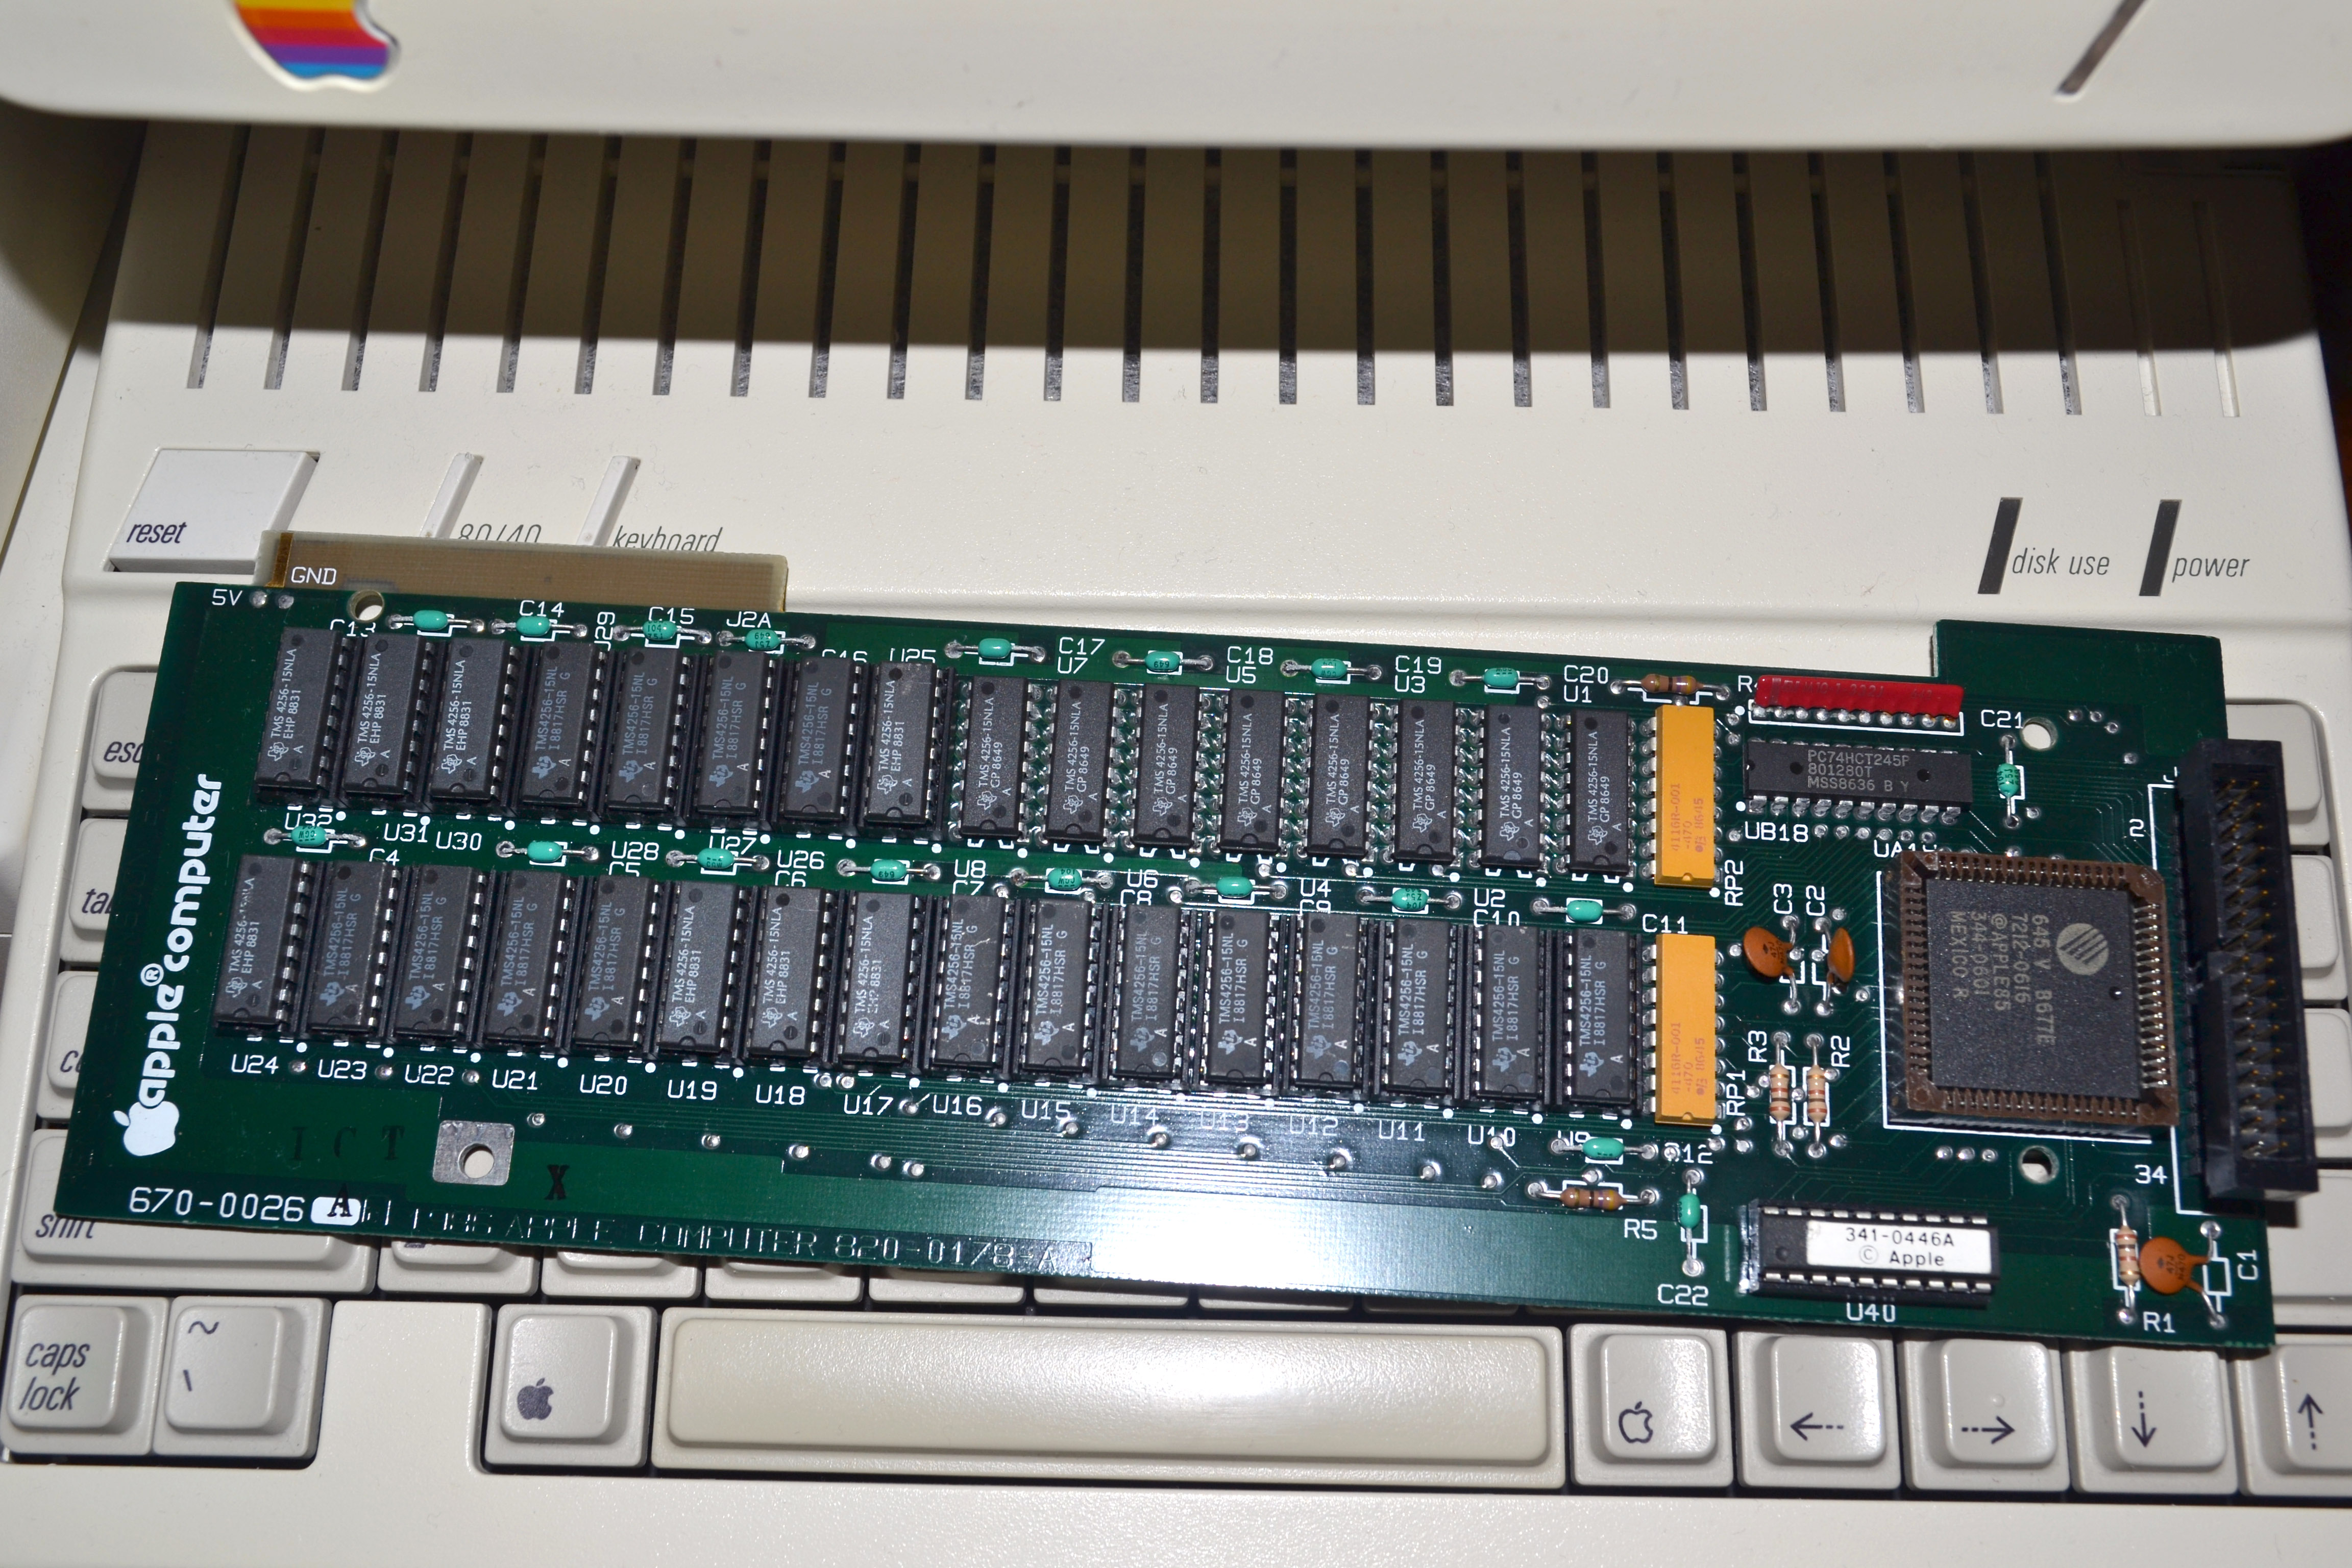
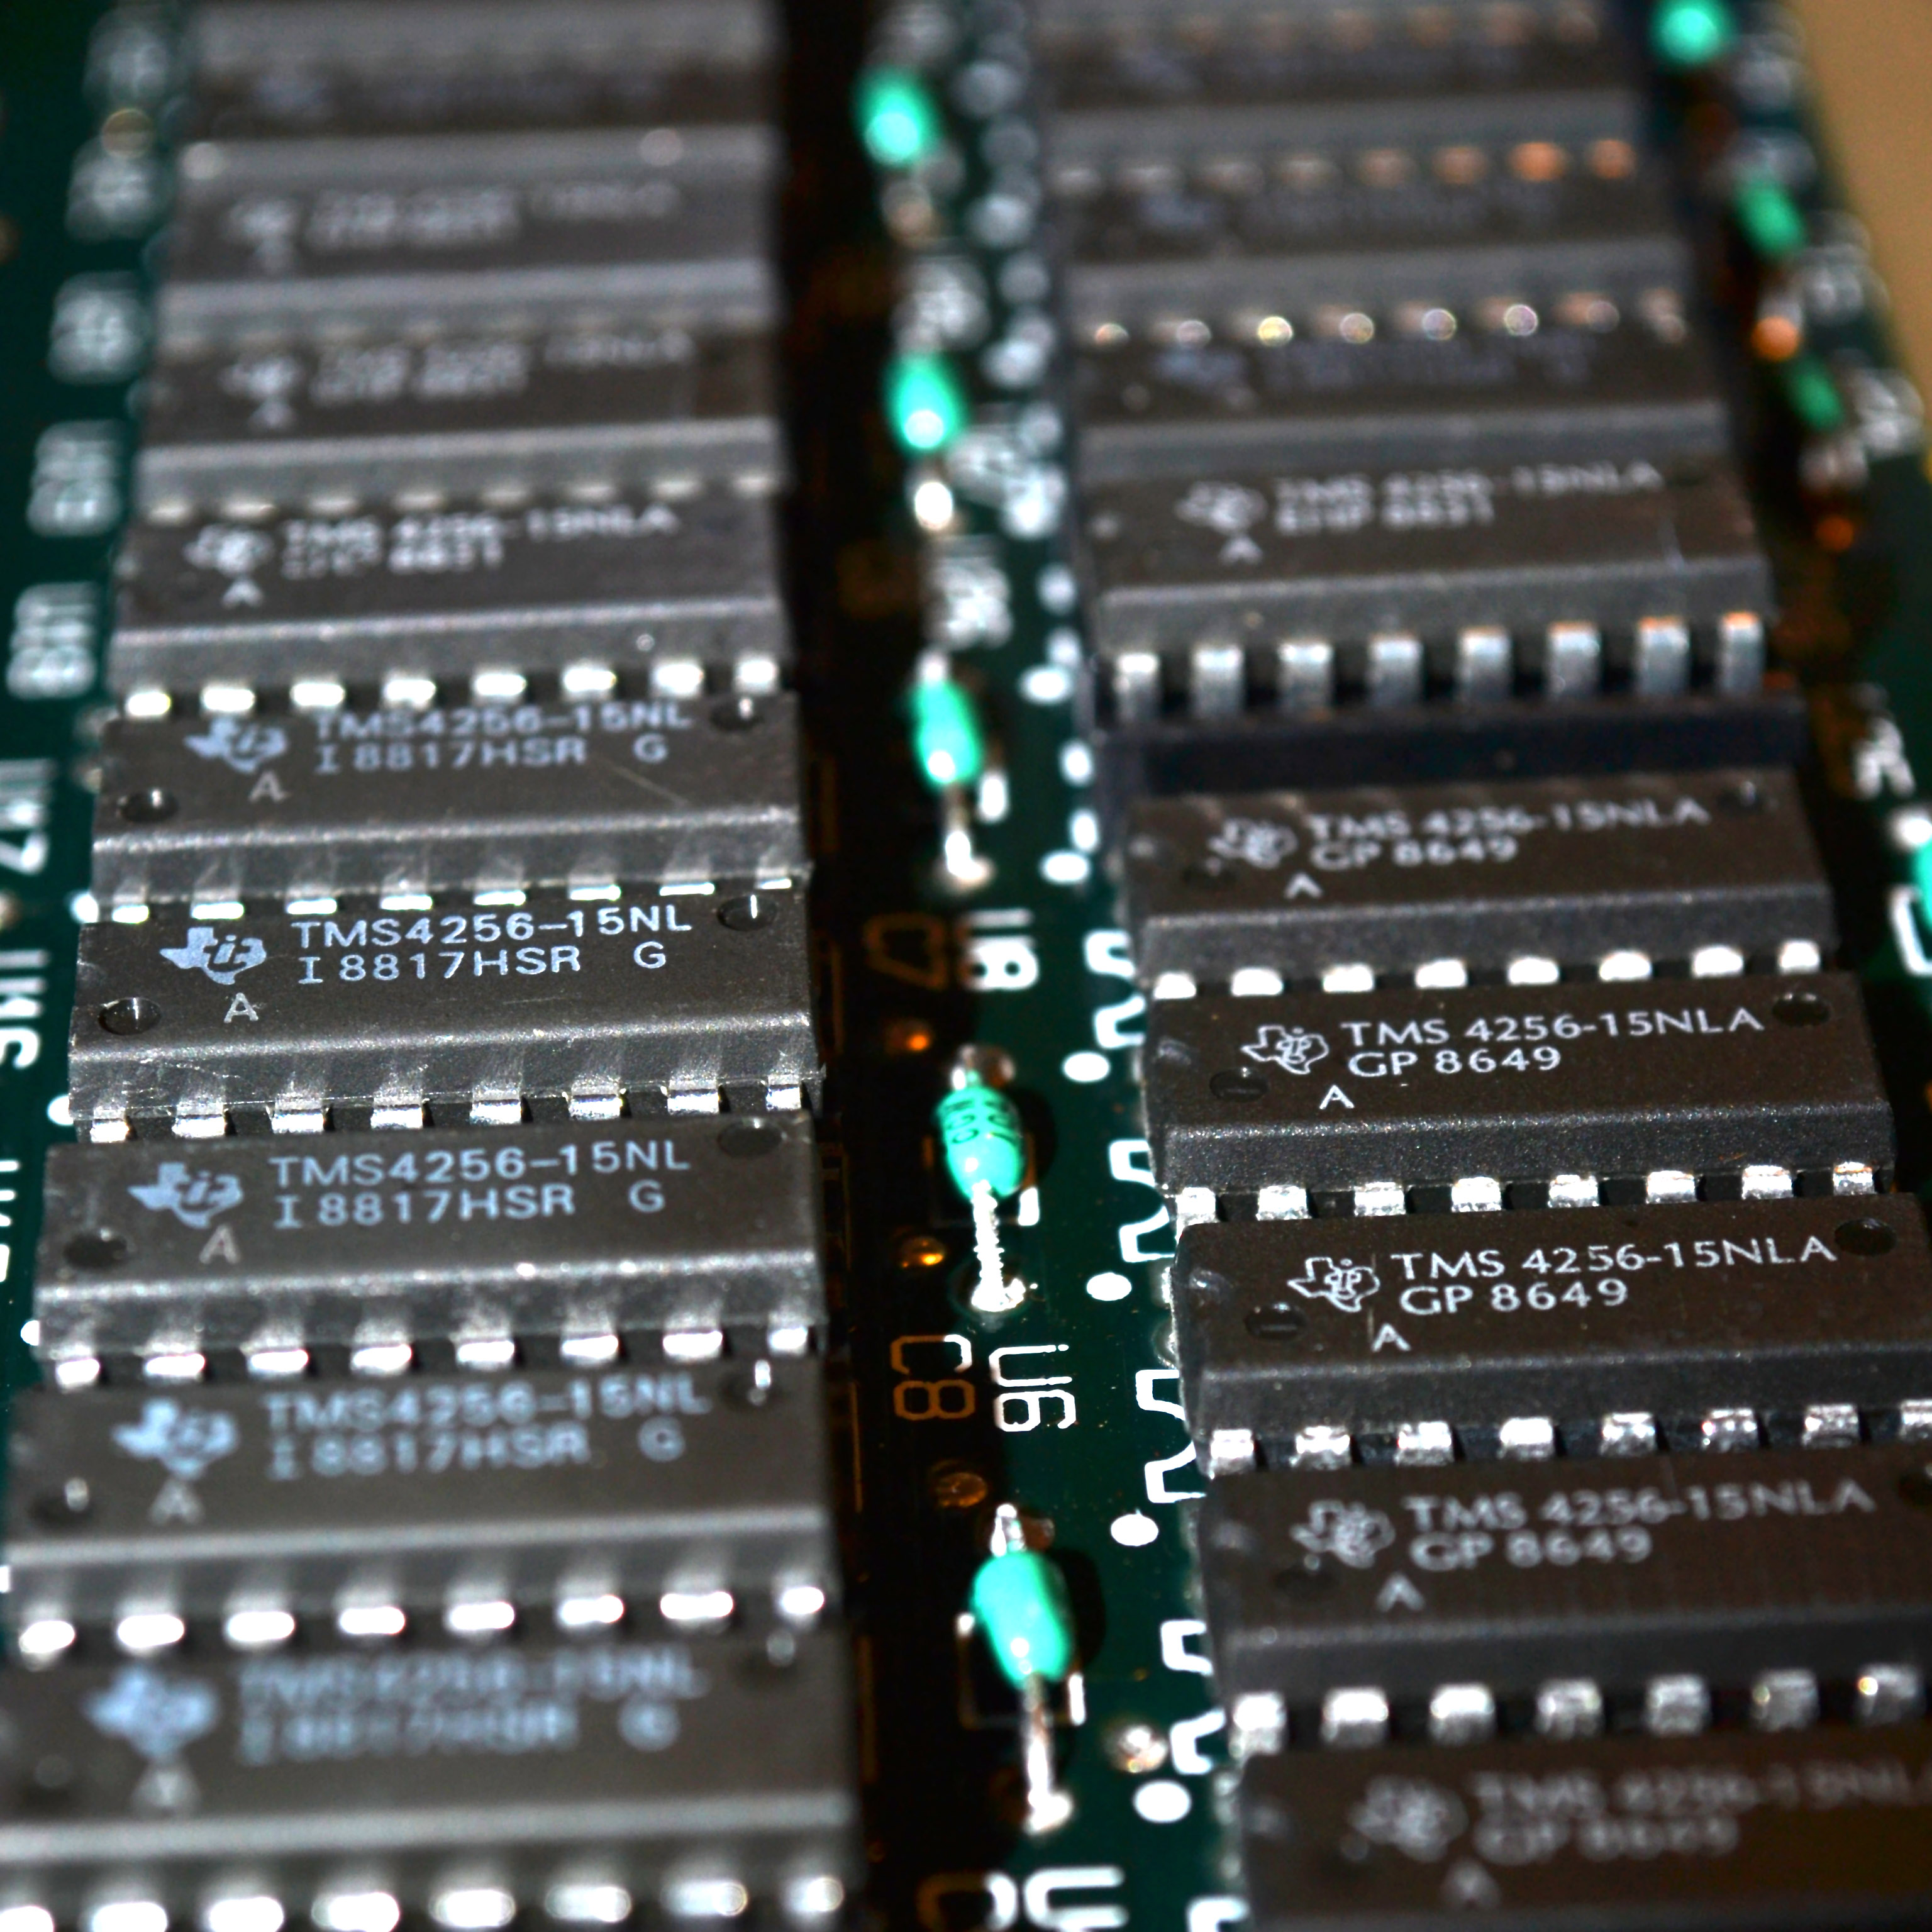
La pieza principal: tarjeta de expansión con 1 MB de memoria, ¡nueva!


Abriendo la //c

Bajo el teclado, el puerto de expansión a la derecha.

Instalado y listo para la prueba
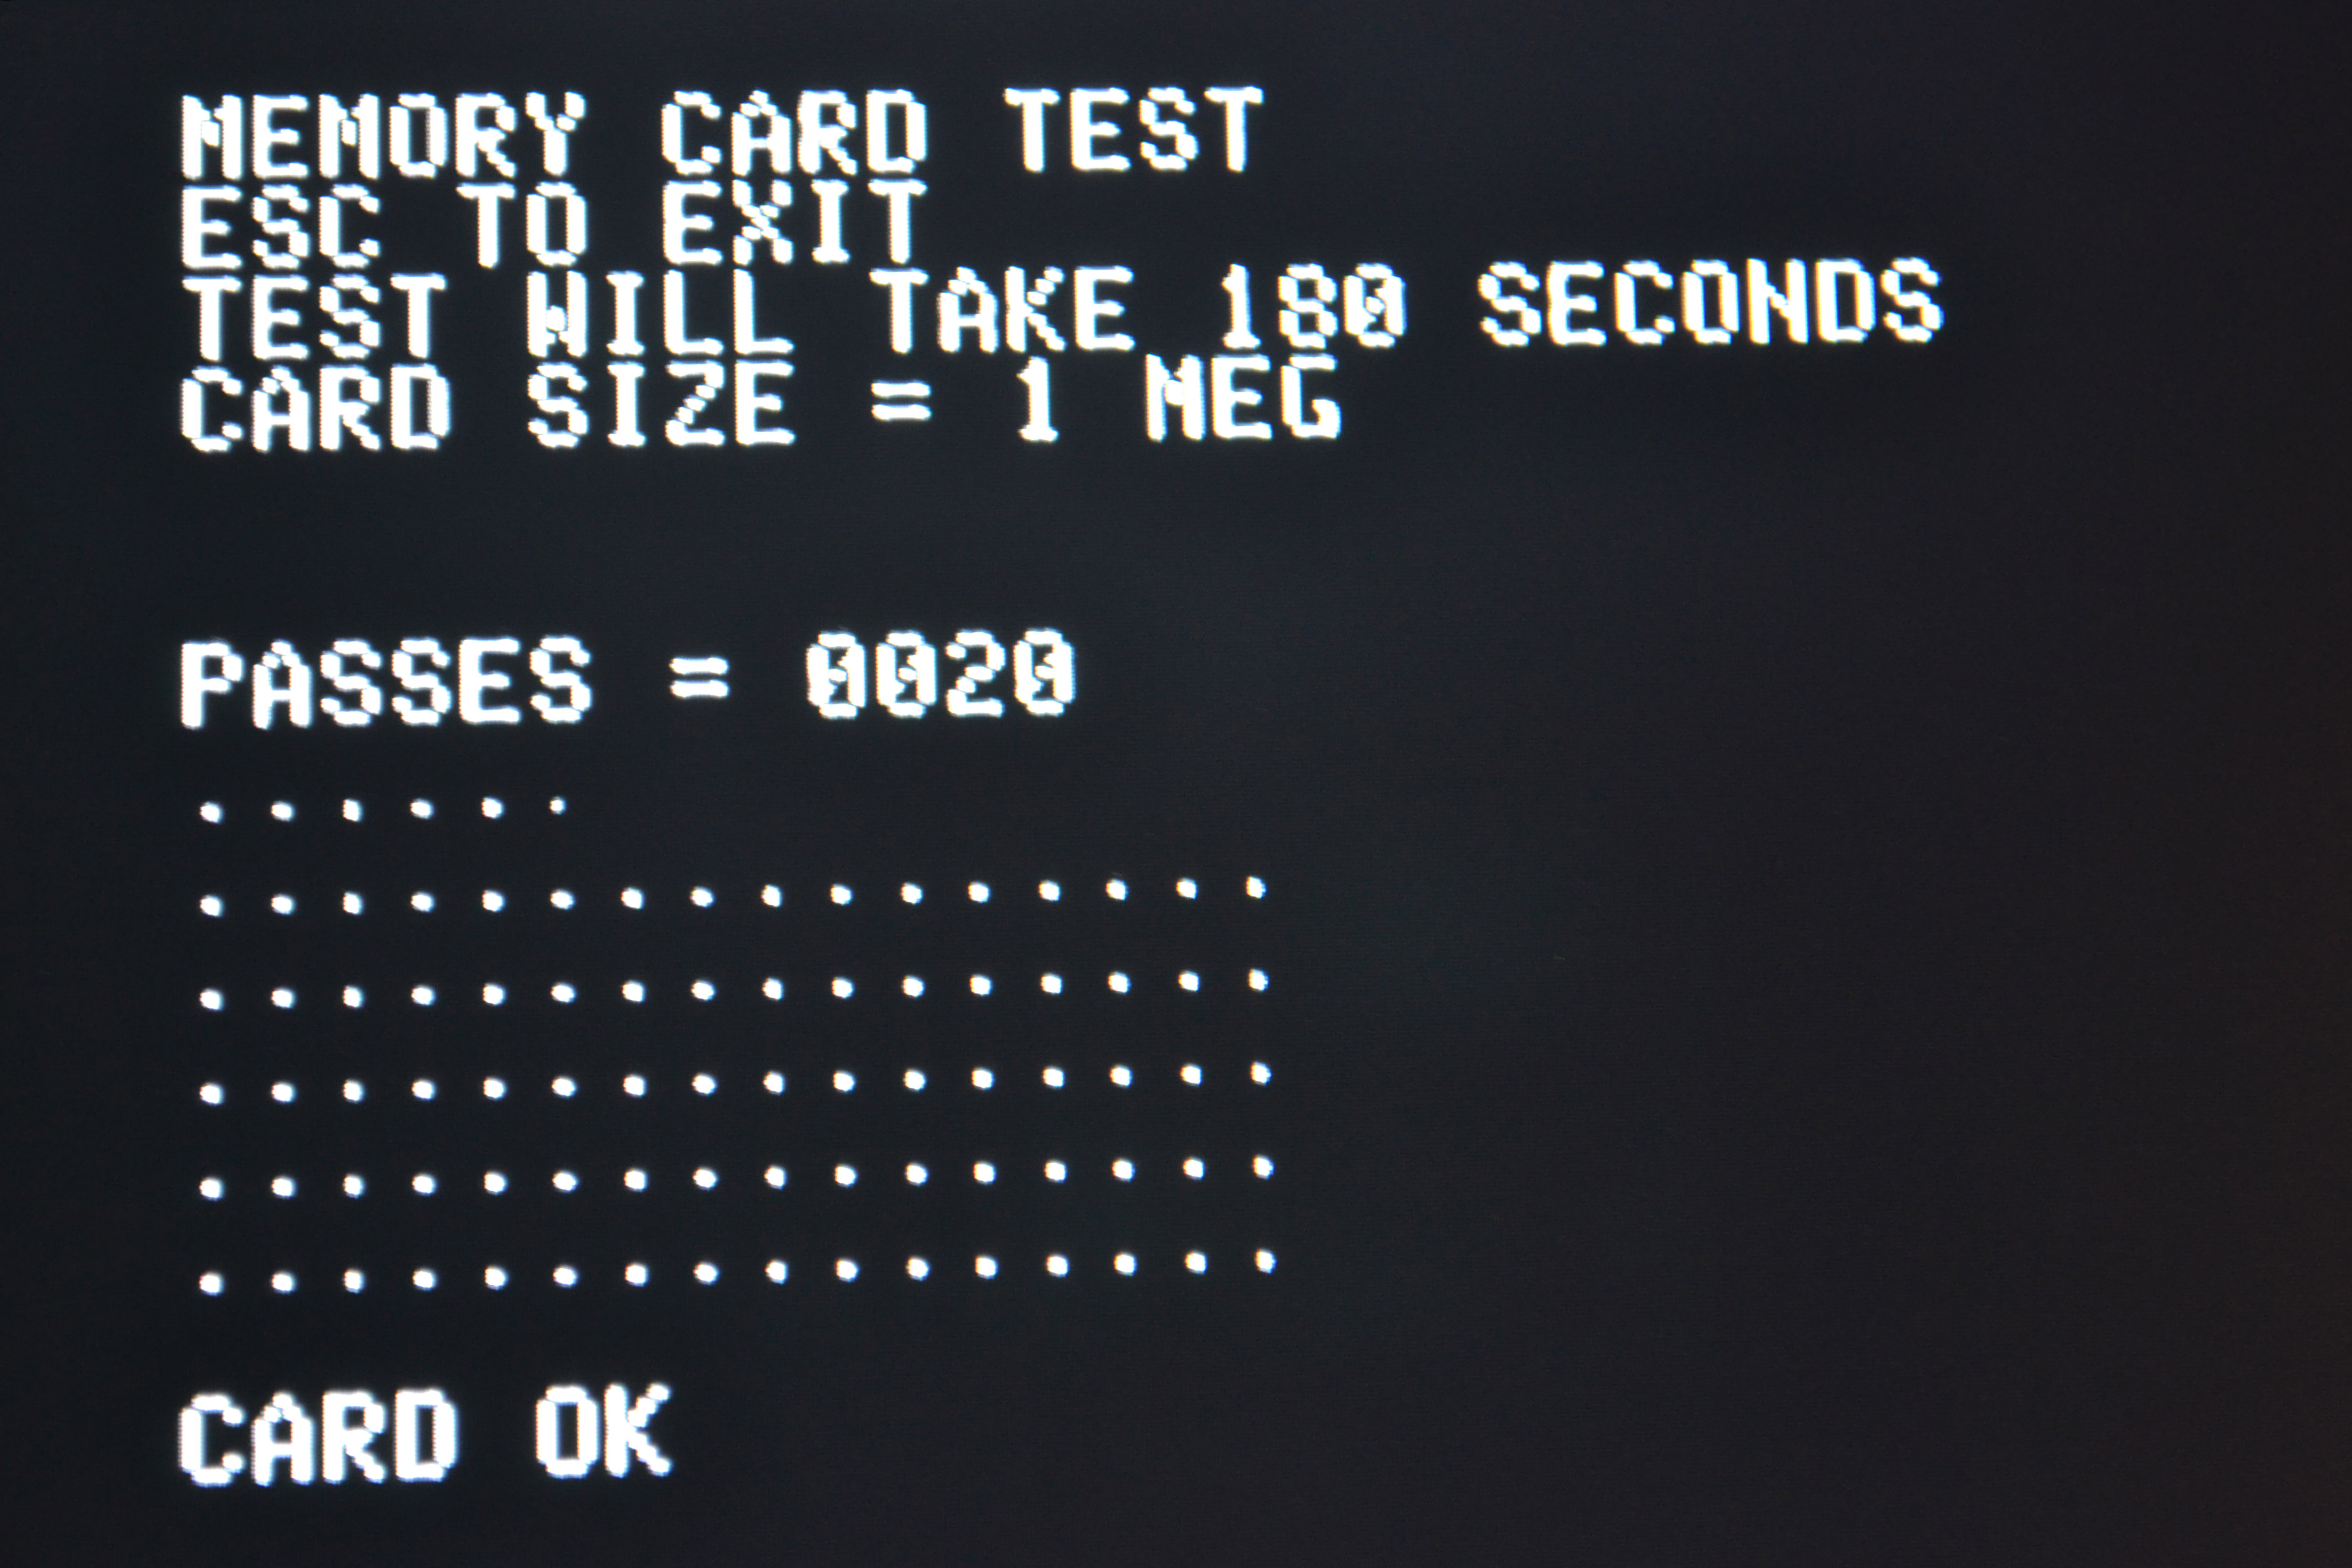
Probando la memoria, ¡veinte veces y todo bien!
Nowadays to talk about Megahertz, Megabytes and even Terabytes for computers is an everyday thing, but thirty years ago computers with 1 MHz and 128 Kilobytes (yes, kilobytes!) were the norm, and updating them were not as easy, specially in portables like the Apple //c.
Reading a bit about its history, I learned that there were several updates not only the motherboard, but the ROM, the first to enter UniDisk then to read extended memory, which could be from 256k up to 1 Megabyte.
Apple offered not only memory cards, Applied Engineering actually created a clock, CP/M and memory card, but today those cards are very hard to find. One of the rarest memory expansions is precisely what Apple offered, and today it’s also really hard to find.
So participating on a retro computer forum, I met someone who had an extra original expansion card for the Apple //c, and I convinced him to sell it to me, in fact at a very good price. At the same time, learned that the ROM version of my motherboard was 3, and there was an update that managed some problems with extended memory.
The problem is that you cannot order these ROMs from Apple any more, and they are not for sale anywhere, at least officially. There is a site that advertise them, Reactive Micro, but apparently they have no longer in existence.
After more research I found the images of the ROMs in a New Zealand site, and used a Canadian company, EPROMPro – to “burn” me the corresponding ROM chip.
It finally arrived, and proceeded to install it fearfully: considering that the ROM comes from a non authorized site, and the person who “burned” the ROM has no way to test it, I’m risking breaking or even disable my valuable computer.
ROM version 4: Memory expansion fix
Replacing the original.
Inserted and ready to test
The real test: “PRINT PEEK(64447)” and the return number means the version.
Now for the principal piece: the Apple //c memory expansion, brand new!
Tarjeta de expansión con 1 MB Memoria Apple IIc
preparing for the operation
The expansion port under the keyboard
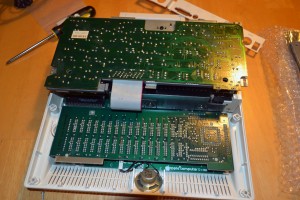
- Installing and all looks fine

- Testing, everything fine!
Posted on December 30, 2012
Clones de Apple //cApple //c clones
![]() At this time I finally had time to enjoy my Apple / / c, so that I could upgrade the motherboard and leave it as new. When I read about the memory expansion for this, I found the link to some clones of Apple II, among the best known is the Franklin Ace 1000 .
At this time I finally had time to enjoy my Apple / / c, so that I could upgrade the motherboard and leave it as new. When I read about the memory expansion for this, I found the link to some clones of Apple II, among the best known is the Franklin Ace 1000 .
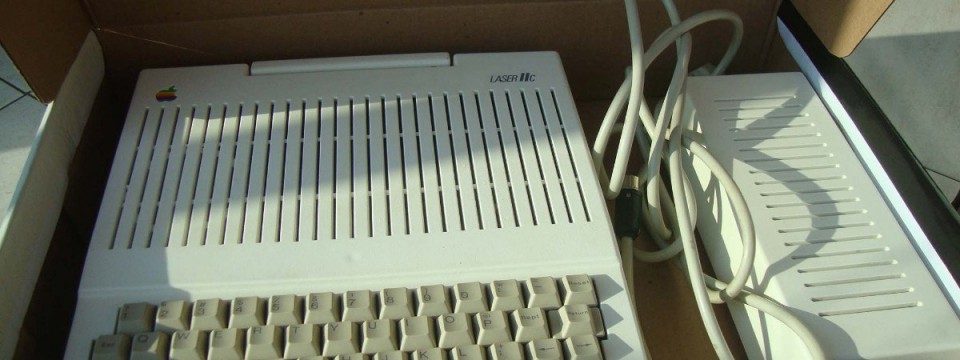
Some clones were physically very similar to the Apple IIe, but there were three specifically based on the Apple / / c: Franklin Ace 500 , Laser 128 – laptop, similar in form and function to the / / c by the handle laptop, the keyboard on the front, side and peripheral floppy back up external power source.
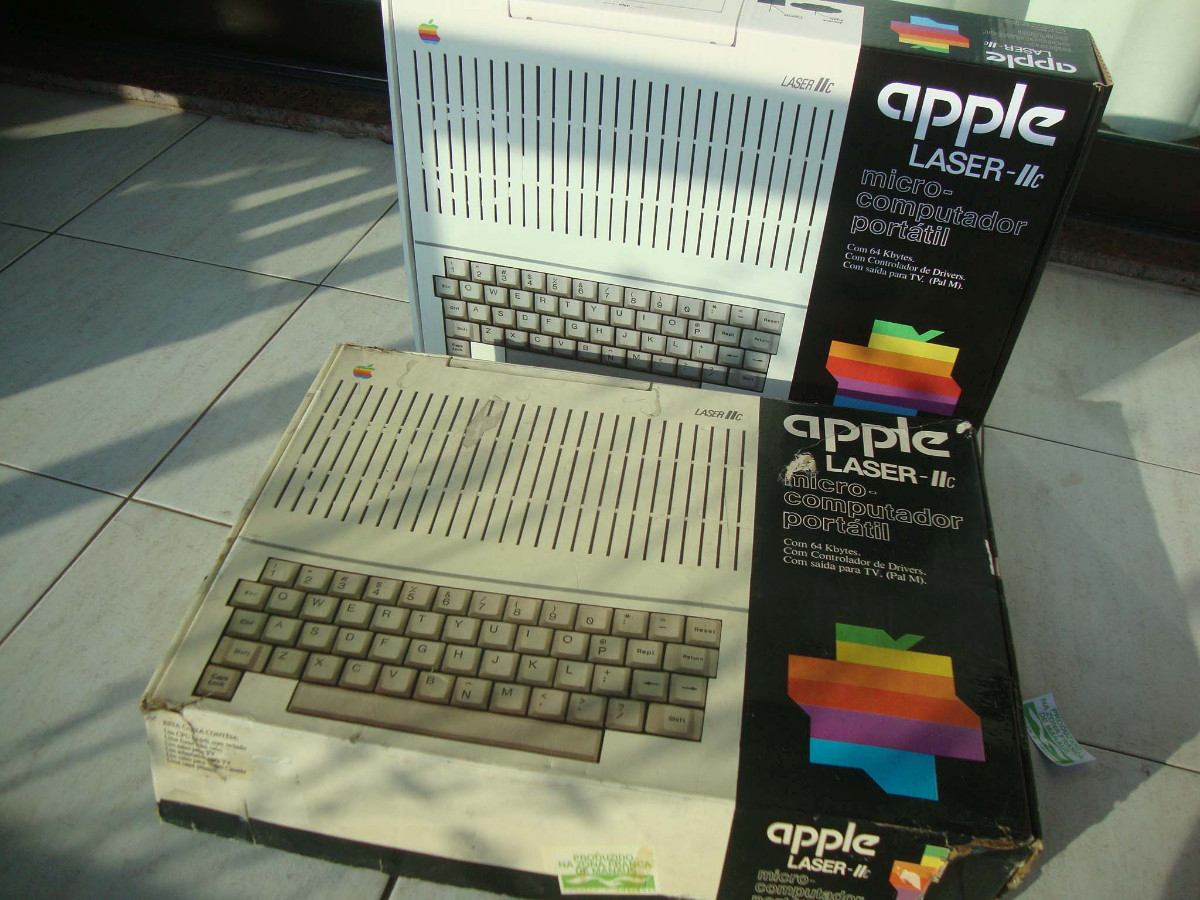
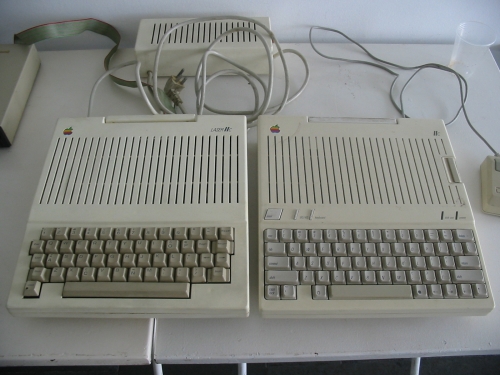 But the newly discovered and that really impressed me was the Milmar Laser / / c, it is an exact copy of the chassis, up to the position of the block, in fact I’m pretty sure used an original chassis to create this, therefore the position of the screws, and the space for the label is identical specifications. The letters of the logo are the same, which changes the thing is on the keyboard and the rear ports, very crude.
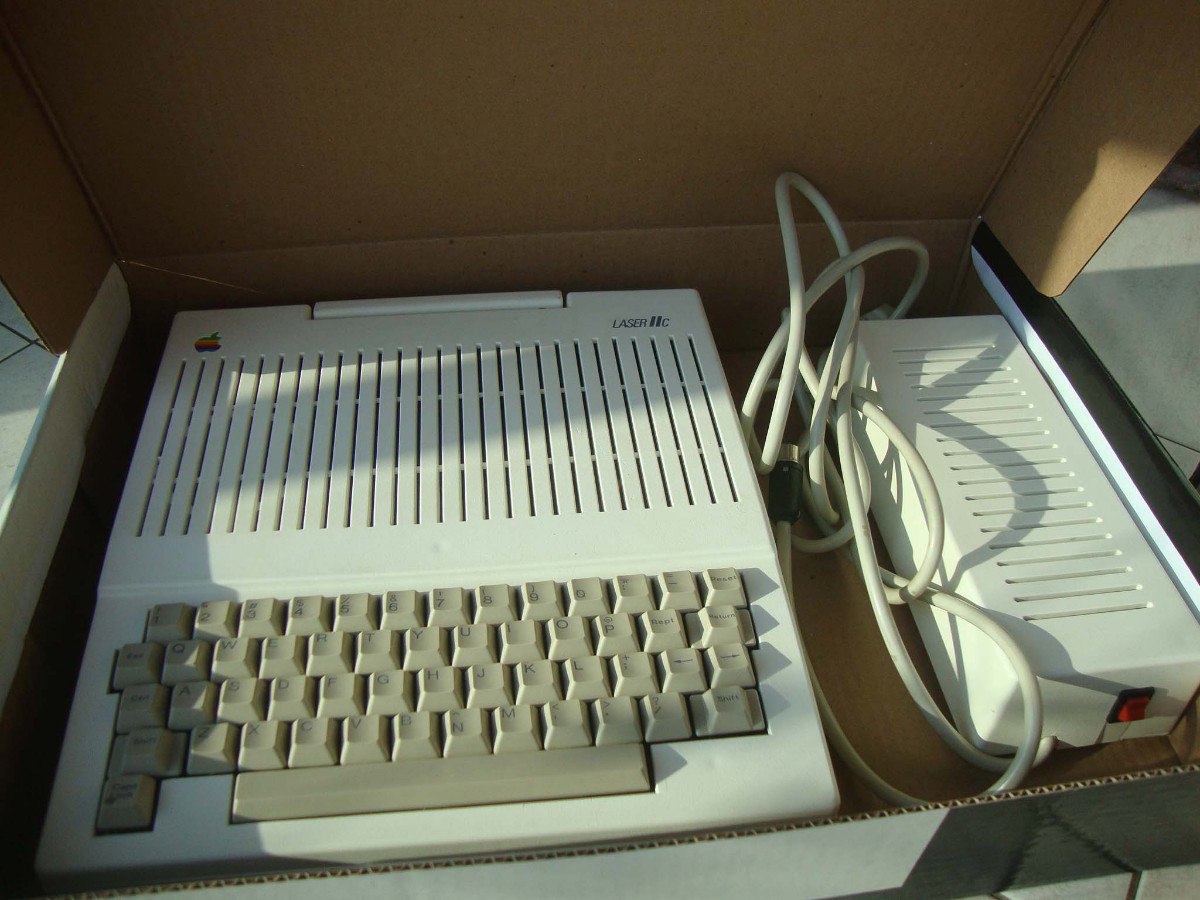
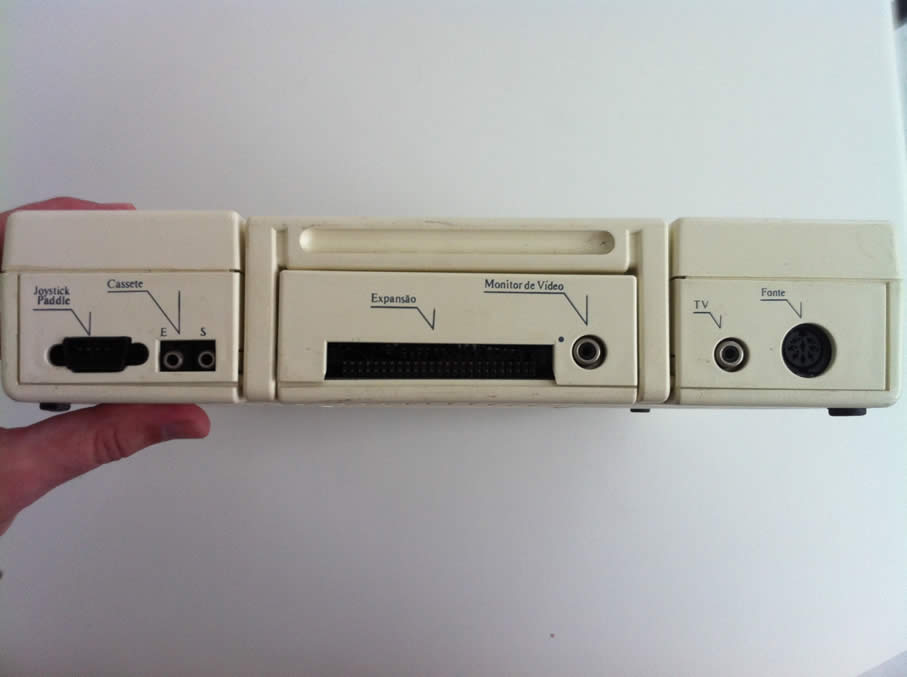
Judging from the pictures and what I read online, had no integrated floppy, but external ports for different drives. it was motherboard Applle II clone. Apparently this was not very successful thanks to the boost in PC IBM Latin America, both in the education market as corporate.
 |
 |
 |
 |
![]() En estas fechas por fin he tenido tiempo de disfrutar mi Apple //c, tanto que he podido actualizar la tarjeta madre y dejarla como nueva. Cuando leía sobre la expansión de memoria para ésta, encontré la liga a algunos clones de Apple II, entre los más conocidos está la Franklin Ace 1000.
En estas fechas por fin he tenido tiempo de disfrutar mi Apple //c, tanto que he podido actualizar la tarjeta madre y dejarla como nueva. Cuando leía sobre la expansión de memoria para ésta, encontré la liga a algunos clones de Apple II, entre los más conocidos está la Franklin Ace 1000.
Algunos clones eran físicamente muy parecidos a la Apple IIe, pero existian tres específicamente basados en la Apple //c: la Franklin Ace 500, la Laser 128 – portátil, parecidas en forma y función a la //c por el asa portátil, el teclado al frente, floppy lateral y periféricos detrás, hasta la fuente de poder externa.
Pero la que recién descubrí y que realmente me impresionó fue la Milmar Laser //c, pues es una copia exacta del chasis, hasta en la posición de la manzana, de hecho estoy casi seguro que usaron un chasis original para crear este, pues la posición de los tornillos, y el espacio para la etiqueta con las especificaciones es idéntico. Las letras del logo son iguales, donde cambia la cosa es en el teclado y los puertos traseros, muy burdos.
A juzgar por las fotos y lo que he leído en linea, no tenía un floppy integrado, sino puertos externos para distintos drives. pues la tarjeta madre era de un clon de Apple II. Al parecer esta no tuvo mucho éxito gracias al gran impulso en latinoamérica de IBM PC, tanto en el mercado educativo como el corporativo.
|
|
|
|
Más fotos incluyendo tarjeta madre (motherboard) donde se puede ver la baja calidad de la computadora.
Posted on December 26, 2012
Nueva tarjeta madreNew Motherboard
 En mi pasión por las computadoras retro he logrado coleccionar muchos de los artículos relacionados con la Apple //c, mi computadora favorita. Hay un par de artículos que me faltan para completarla: el monitor LCD y la bolsa para transportarla, pero por el excesivo costo al que se venden no me he hecho de ellas.
 Sin embargo hace unos días navegando por eBay encontré un artículo que llamó mi atención: una auténtica y completamente nueva actualización de tarjeta madre, incluyendo papeles de Apple.
Lo novedoso de esta tarjeta es que incluye un puerto de expansión al que se puede conectar una expansión de hasta 1 GB de memoria.
después de una puja contra otros diez contrincantes, gané la preciada pieza.
Por fin me llegó ayer, y procedí al reemplazo.
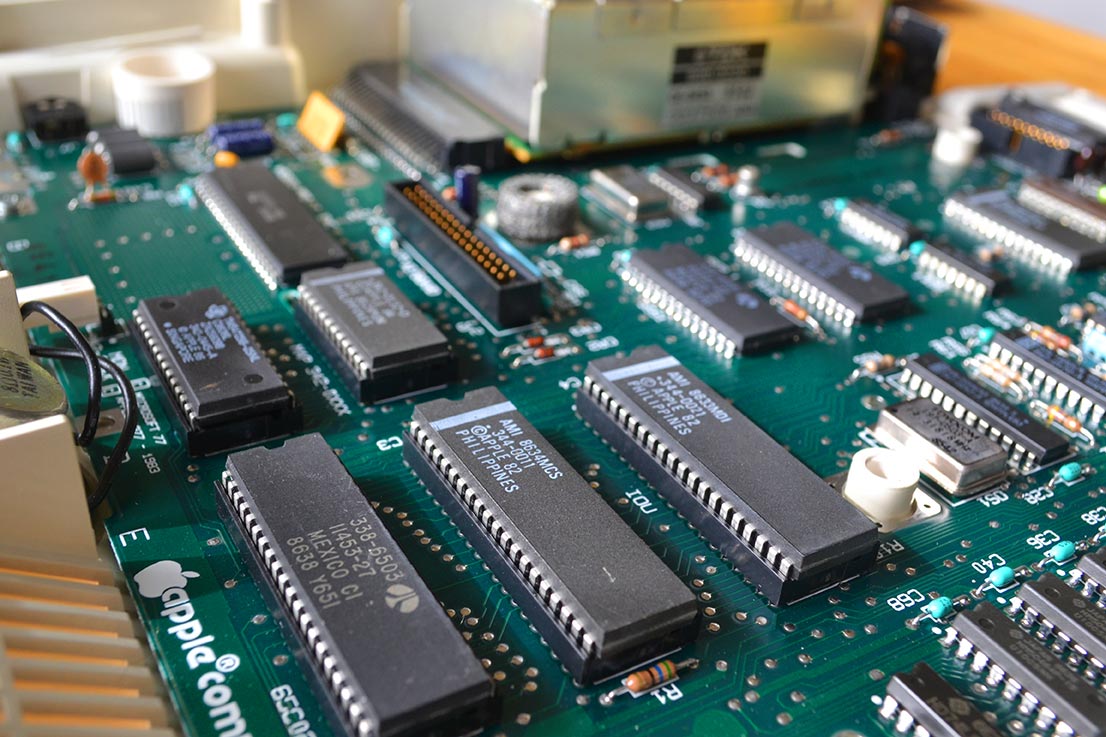
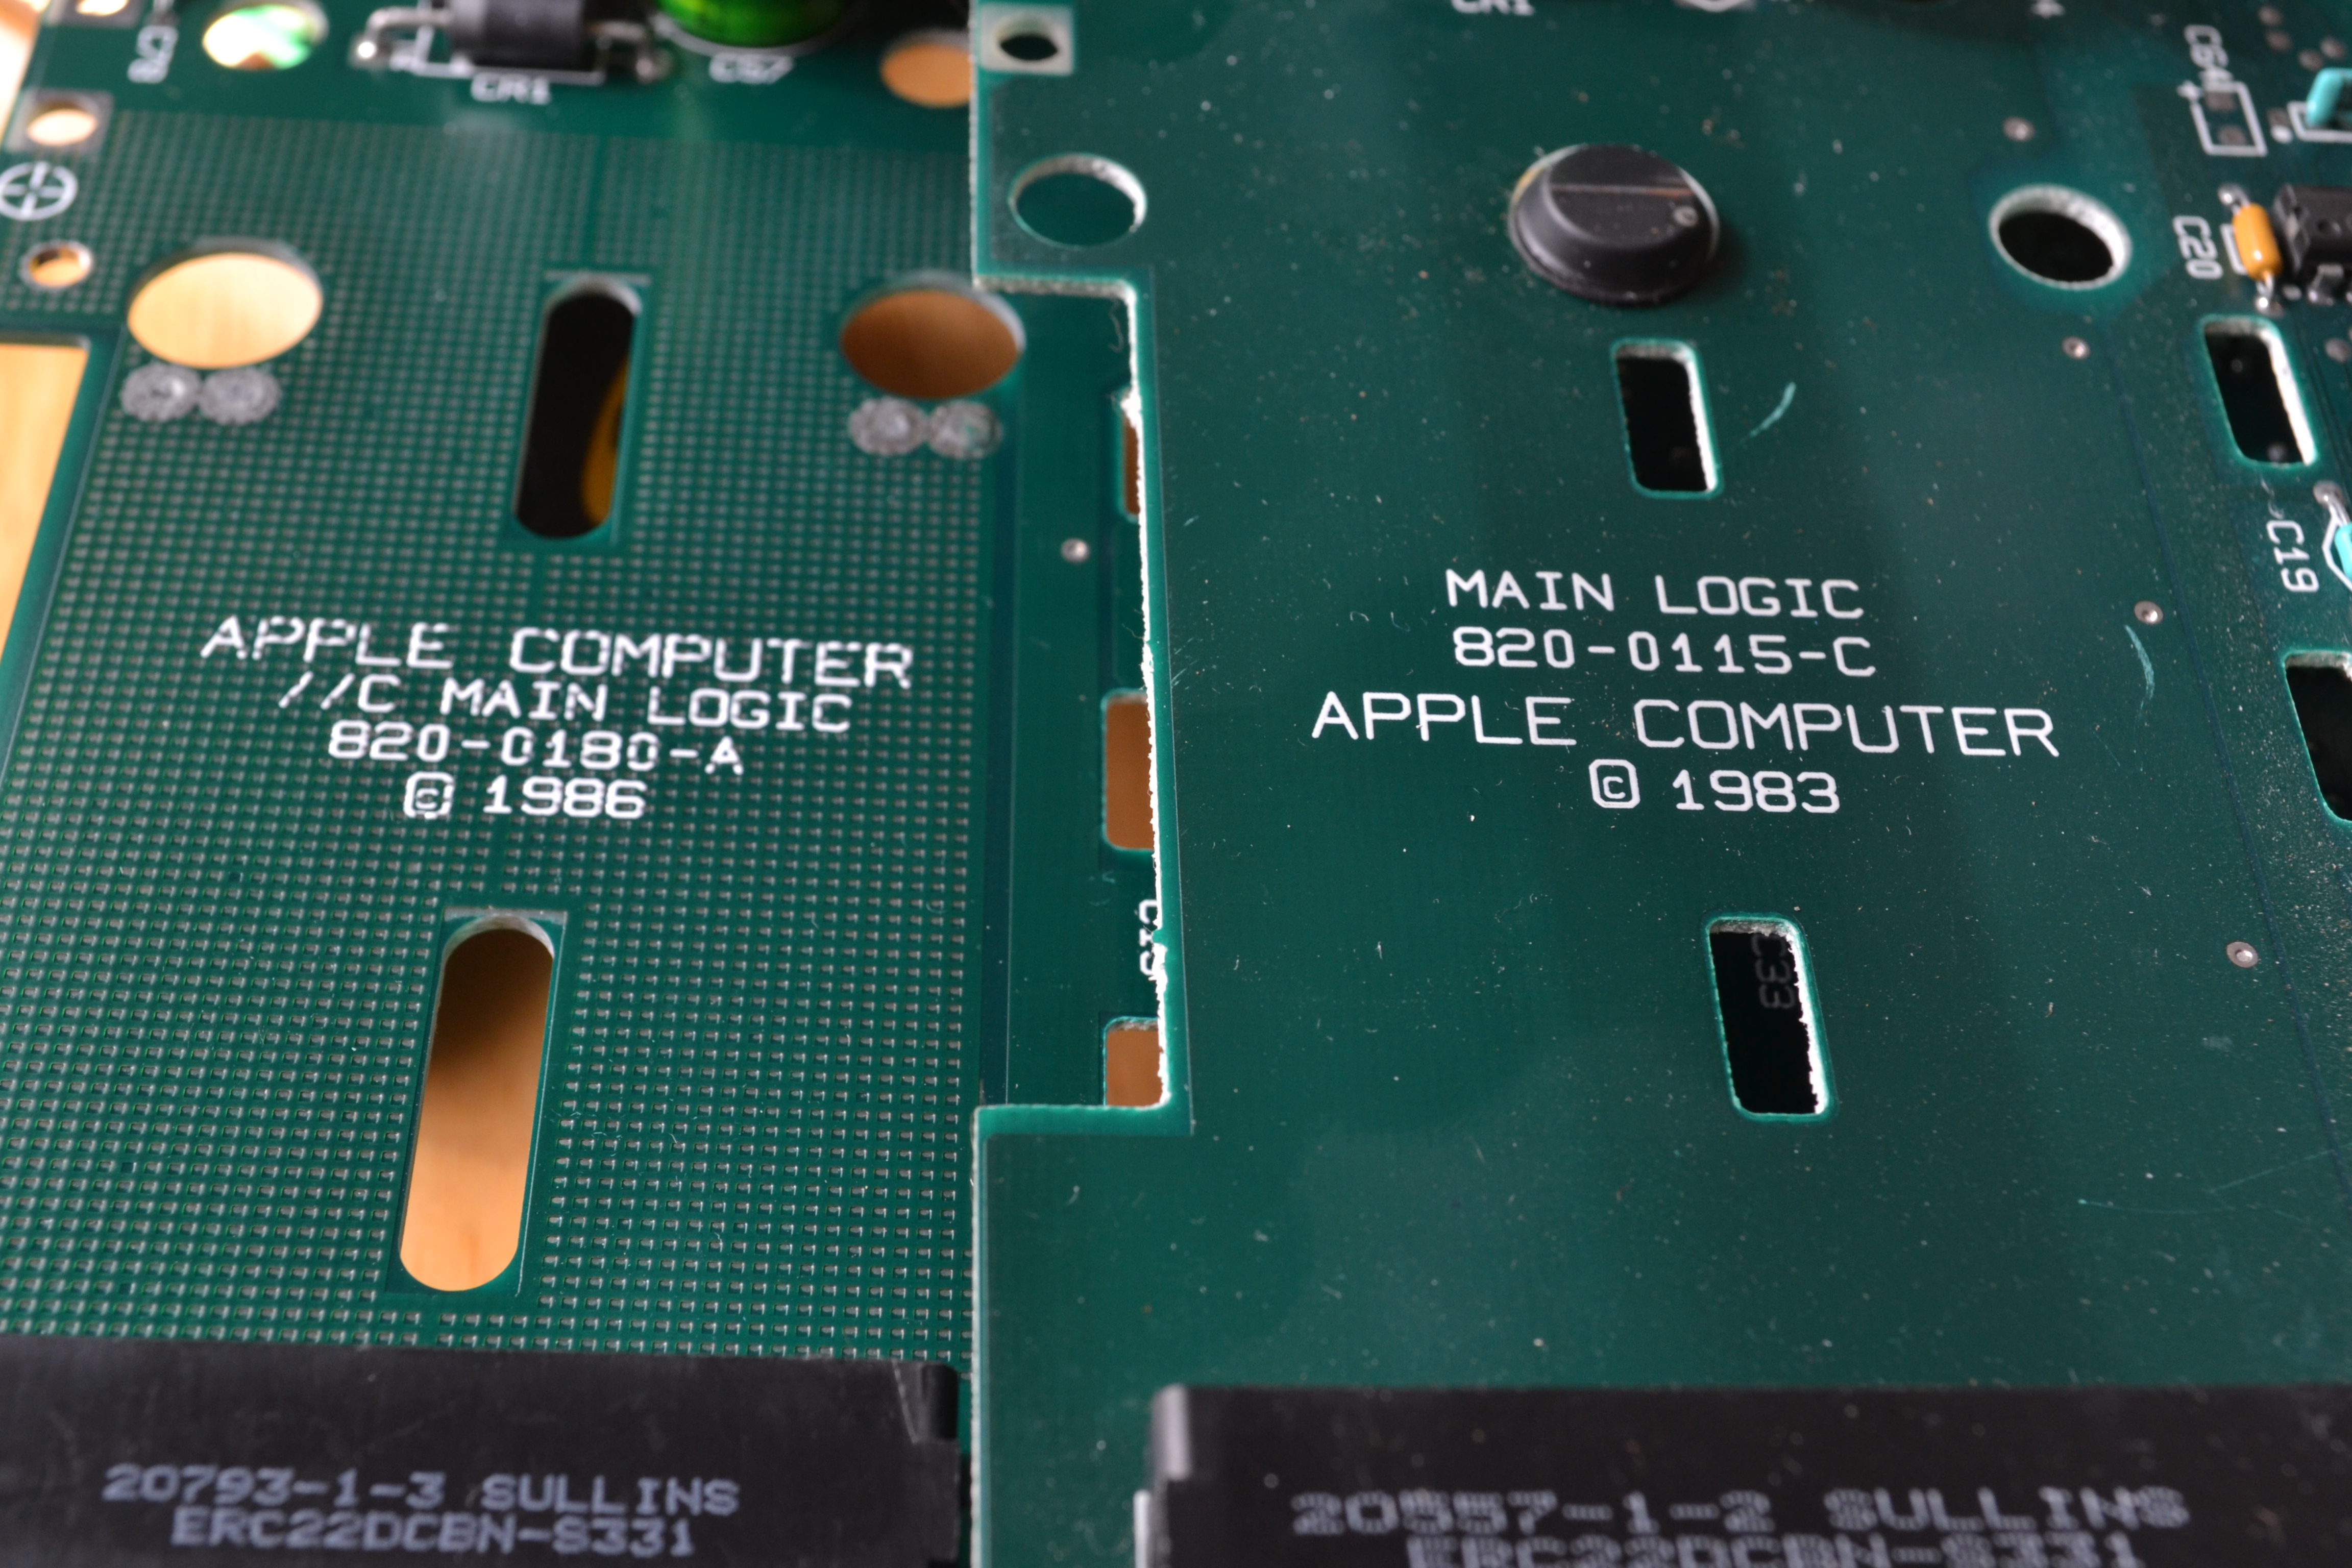 Definitivamente la tarjeta es nueva, comparé ambas tarjetas y en principio la fecha es distinta: tres años de diferencia. Eso indica que no solo los componentes son mas actuales, sino que la versión de ROM es mas nueva.
El cambio fue muy rápido y sin problemas, anteriormente había actualizado el ROM original (255) a versión 0, que soporta el UniDisk, la cual por cierto se determina escribiendo al arrancar la computadora sin disco “PRINT PEEK (64447)”, y desplegará un número correspondiente a la versión de ROM:
255 – ROM original
0 – ROM versión ‘0’
3 – ROM versión ‘3’
4 – ROM versión ‘4’
 La nueva tarjeta madre contiene la versión 3, cuyas mejoras son:
Nuevo diseño de Tarjeta Madre
Puerto de 34-pins añadido para conectar tarjeta de memoria de hasta 1 MB
Soporte de AppleTalk
Color del teclado cambiado de beige a platino
Sé que realmente no es gran cosa lo que se añade en esta nueva tarjeta, pero es casi como tener una Apple //c nueva, con la oportunidad de añadirle la tarjeta de memoria si algún día la encuentro.
 In my passion for retro computers I have managed to collect many items related to Apple //c, my favorite computer. There are a couple of items that I still need to complete it: the LCD monitor and the bag to carry it, but the excessive cost when sold I have not made them.
 But a few days ago browsing eBay I found an article that caught my attention: a genuine and brand new motherboard upgrade, including roles at Apple.
The novelty of this card is that it includes an expansion port to which you can connect a expansion up to 1 GB of memory .
after a bidding war against another ten opponents, won the prized piece.
It finally arrived yesterday, and proceeded to replacement.
Definitely the card is new, I compared both cards and the date is different principle: three years apart. This indicates that not only are more current components, but the ROM version is newer.
The change was very fast and smooth, had previously updated the original ROM (255) to version 0, which supports the UNIDISK, which is determined by the way writing when booting diskless “PRINT PEEK (64447)”, and display a number corresponding to the version of ROM:
255 – Original ROM
0 – ROM version ‘0 ‘
3 – ROM version ‘3 ‘
4 – ROM version ‘4 ‘
The new motherboard contains Version 3, which improvements are:
Redesigned Motherboards
Port 34-pins added to connect memory card up to 1 MB
AppleTalk Support
Keyboard color changed from beige to Platinum
Be really no big deal what is added in this new card, but it’s almost like having an Apple / / c new, with the opportunity to add a memory card if you ever find it.
Posted on November 13, 2012
Impresora Apple ScribeApple Scribe printer
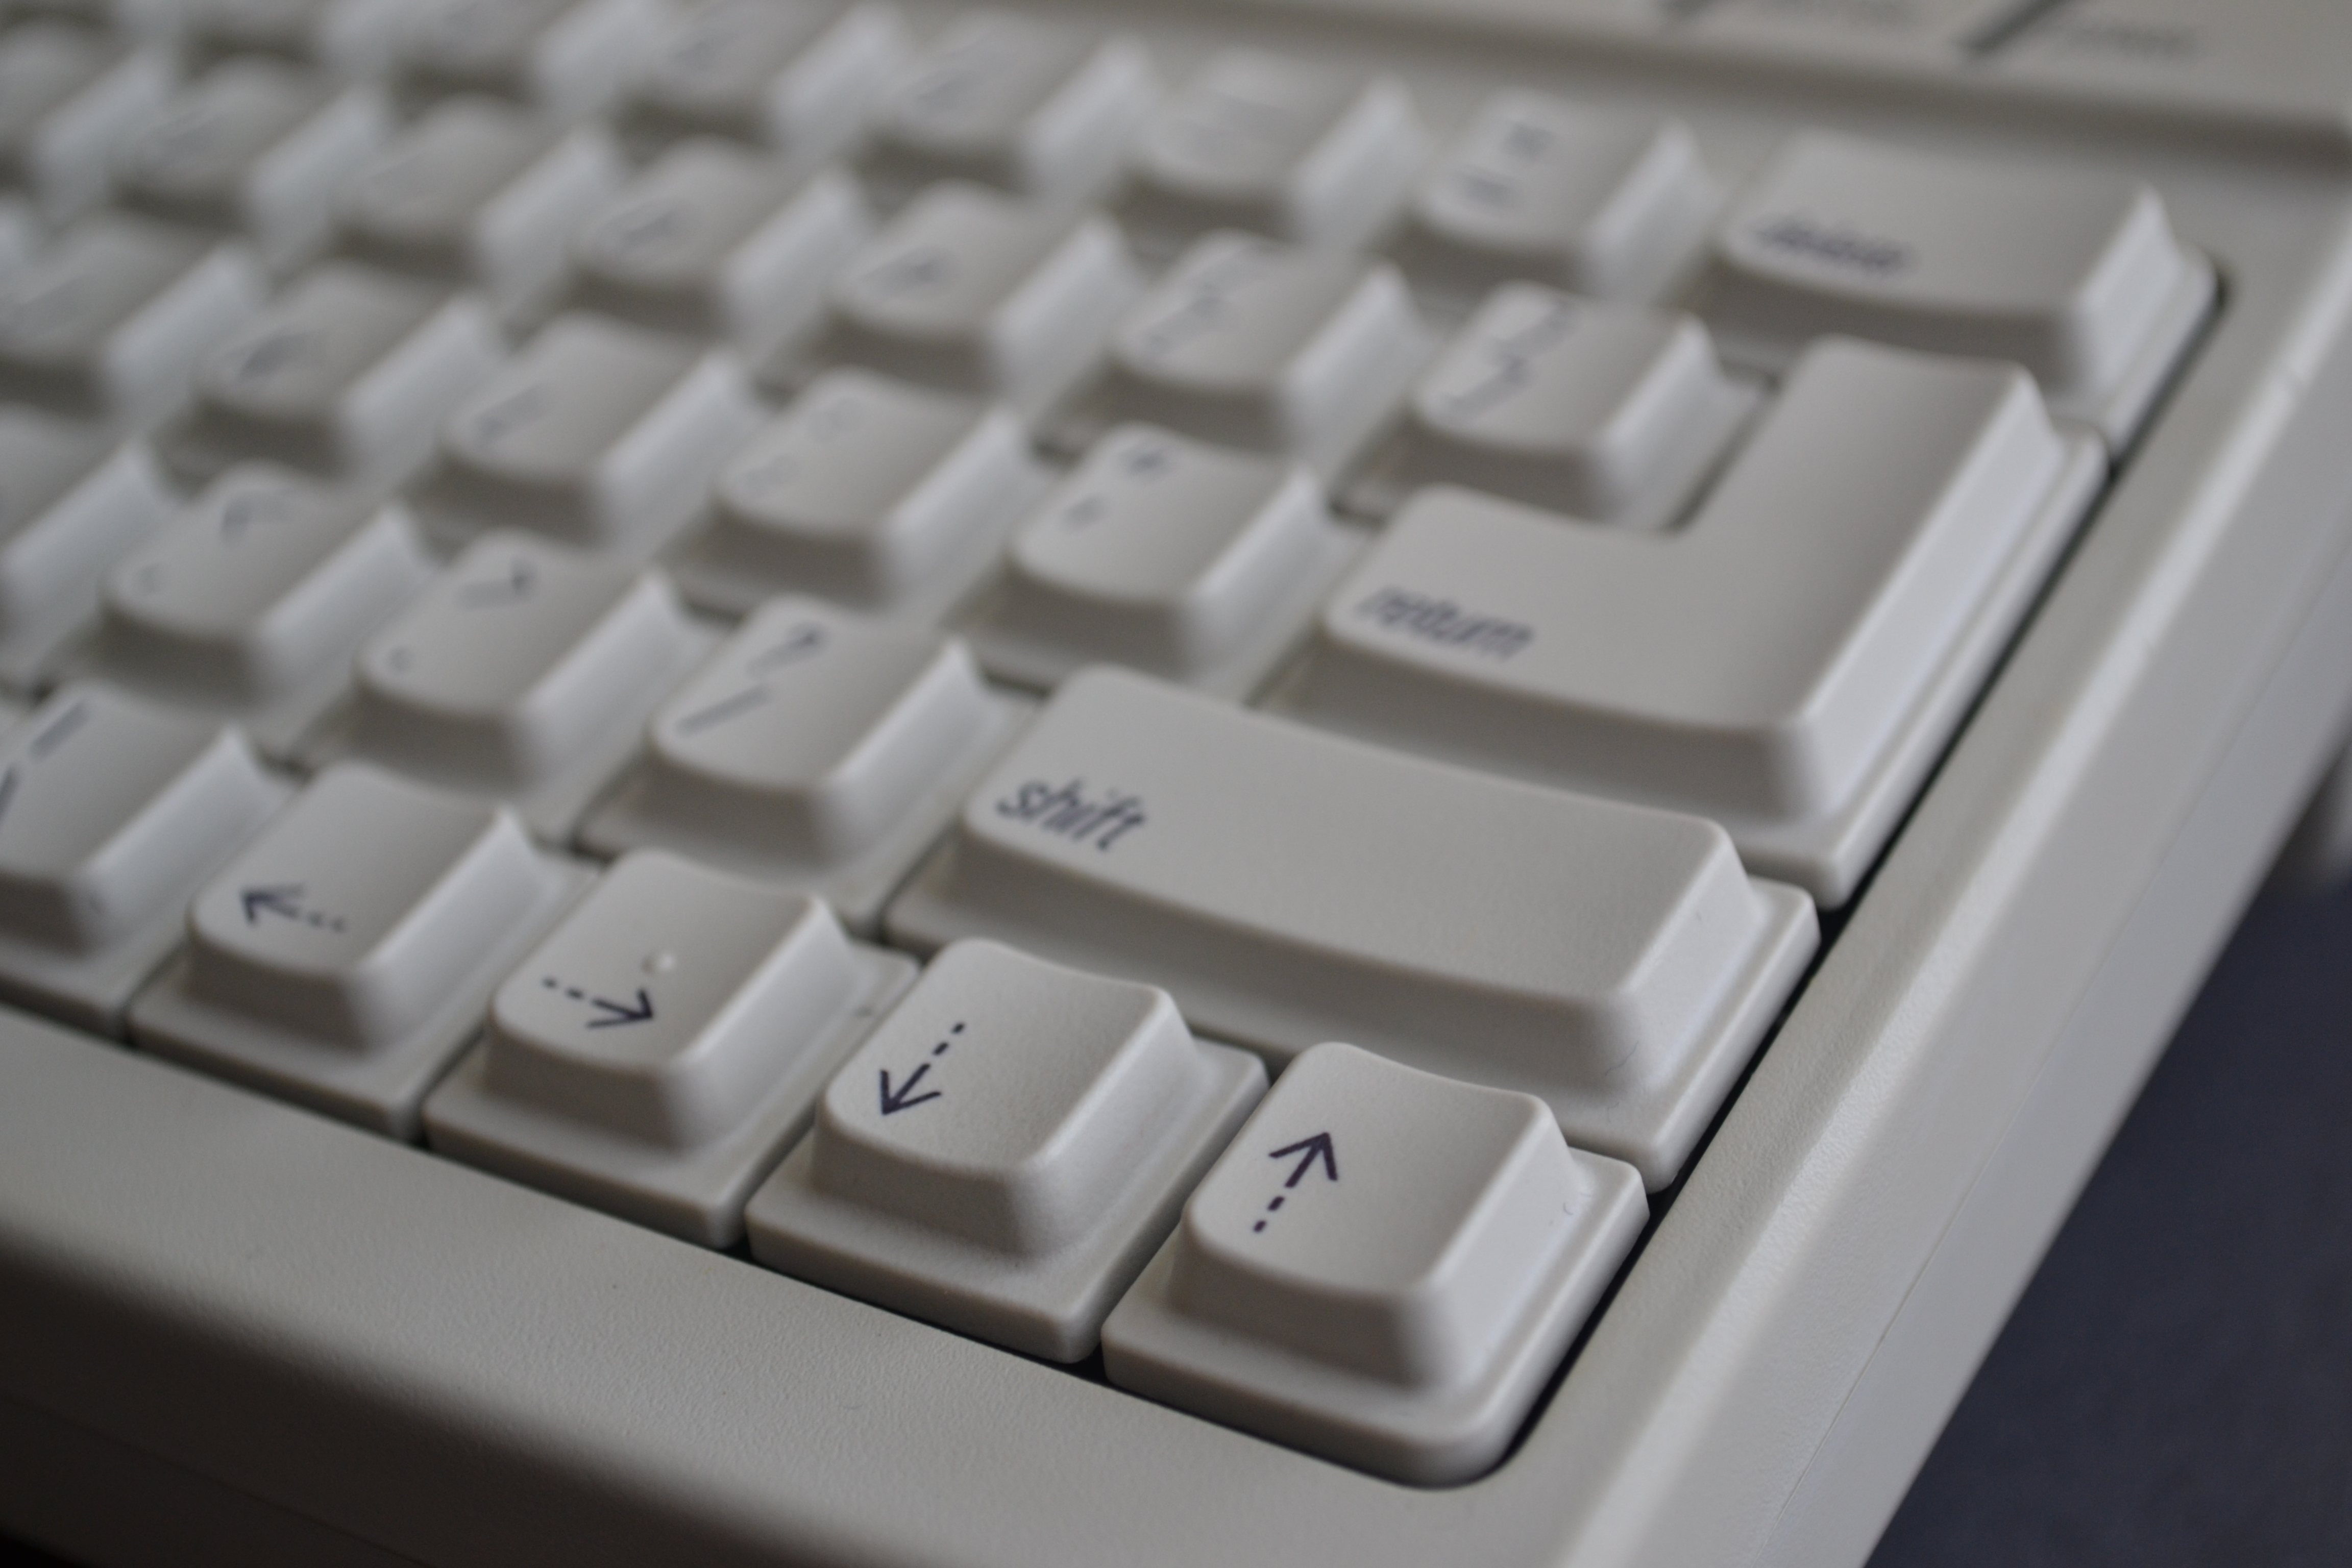
 Continuing the retro theme, the design of the //c was based on a cream color, parallel lines and buttons with sloped buttons.
Both the CPU, the external drive and a little UniDisk share those looks. To use the power supply lines and creamy. One of the last peripherals that shared this style was the Apple Scribe Printer.
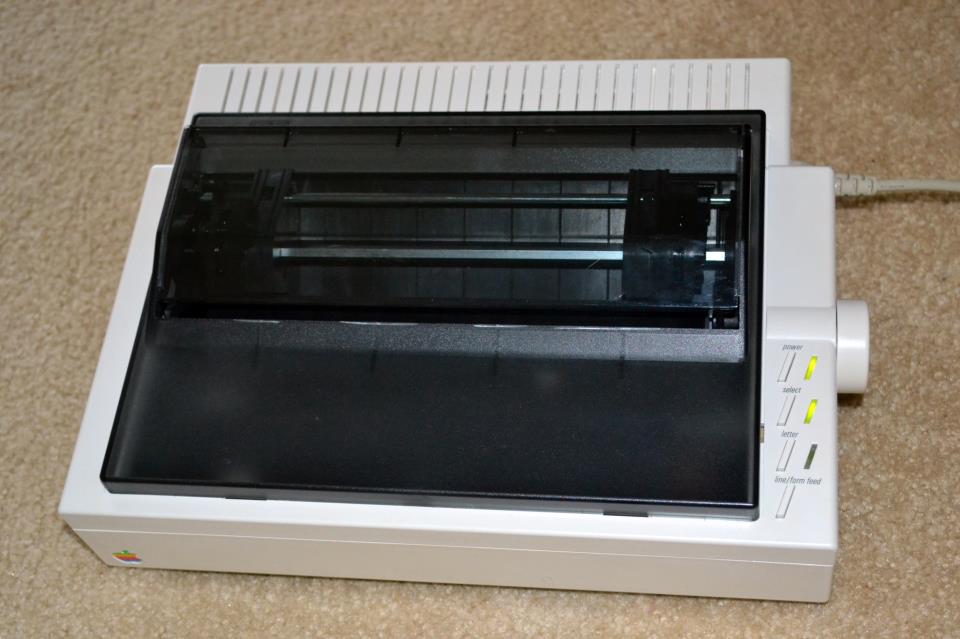
This printer had the same style buttons on the //c, was based on heat transfer, using a tape with four-color inks wax that “burned” it on paper resulting in higher quality printouts than dot matrix printers. The problem was that the tape was very short and expensive, besides being very slow.
I got this wonder on the popular auction site eBay, and end up paying $16 for it, a real bargain. The printer was in perfect condition, plug it and it worked at first try, but the ink as expected was old and dry, so printed with spaces and failures. Fort the age the plastic was in very good condition, just a little yellow, which improved immediately after a few hours of Retrobrite.

Siguiendo con el tema retro, el diseño de la //c se basaba en el color crema, las lineas paralelas y los botones inclinados y largos. Tanto el CPU como el disco externo y un poco el Unidisk comparten esa estética. Hasta la fuente de poder usa el color crema y las lineas. Pero uno de los últimos periféricos que compartieron este estilo fue la impresora Apple Scribe. Esta impresora tiene los botones del mismo estilo que la //c, es de transferencia de calor, usando una cinta con cuatro tintas de cera a colores que “quema” sobre el papel resultando una calidad mayor a las impresoras de matriz. El problema es que la cinta dura muy poco y es cara, aparte de ser muy lenta. Conseguí esta maravilla en el conocido sitio de subastas eBay, y termine pagando $16 por ella, una verdadera ganga. La impresora estaba en perfectas condiciones, la conecte y funciono a la primera, aunque la tinta como era de esperarse esta vieja y seca, e imprime con espacios y fallas. Para tener la edad que tiene el plástico estaba en muy buen estado, solo un poco amarillo, lo cual mejoro inmediatamente después de unas horas de Retrobrite.
Posted on September 26, 2012
Mas sobre Raspberry PiMore Raspberry Pi
For some time I have kept the Raspberry Pi under wraps, being focused on other projects like my collection of Apple IIc.I have not used this little wonder, but have heard of new implementations that have come out lately, in the field of “Media Center”.
Anyway, last week I decided to revive it, using the news of the creation of a “Turbo” mode that speeds up to 1 Ghz processor.
With this in mind I went to the page RaspBMC, (my favorite version of the Xbox Media Center), and found that it’s now in version 4, which I proceeded to download and install on my SD card.
After a long installation, XBMC loadedand to my great surprise that not only runs faster, but all the past problems were corrected.
 My greatest joy was when I installed a couple of scripts, the “TV a la carta” to view TV from Spain, and “Navi-X” active worldwide channels and videos “on demand.” Everything works great, and with great emotion disconnect it and went back to my old install on traditional television, using the video outputs and stereo audio RCA. Everything worked perfectly, but of course, the XBMC is optimized for digital displays, and text in a traditional TV is very small and thin.
Without taking this into account, I took the “Airplay” to see some videos from the iPad, check Navi-X and I must say I am very happy with the miraculous device. True, it’s not perfect: a few times and was locked that “reset”, and having to use a USB keyboard (I have one wireless, which is at least more comfortable) runs and handles decently. I guess version 5, very early out according RaspBMC page, will implement the turbo mode so I hope to match the speed of AppleTV2, and is a tough contender.
Meanwhile I will enjoy this excellent device in my old TV, and continue to report success.
I welcome your feedback.Desde hace un tiempo he tenido guardado el Raspberry Pi, por estar concentrado en otros proyectos, como mi colección de apple IIc. No he usado esta pequeña maravilla computacional y la verdad es una pena con las nuevas implementaciones que han salido últimamente, tanto en el campo de “Media Center”.
El caso es que hace una semana decidí revivirla, aprovechando la noticia de la creación de una modo “turbo” que acelera el procesador a 1 Ghz.
Con esto en mente me dirigí a la pagina de RaspBMC, mi versión favorita del Xbox Media Center, y con gusto descubrí que ya van en la versión 4, la cual procedí a bajar e instalar en mi tarjeta SD.
Después de un buen rato de instalación, el XBMC cargó, con la gran sorpresa de que no solo funciona mas rápido, sino que todos los problemas anteriores estaban subsanados.
Mi mayor felicidad fue cuando le instale un par de scripts, el “tv a la carta” que permite ver TV de España, y “Navi-X” que activa canales de todo el mundo y vídeos “bajo demanda”. Todo funciona de maravilla, y con gran emoción lo desconecte y volví a instalar en mi vieja televisión tradicional, aprovechando las salidas de video RCA y el audio Estéreo. Todo funciono perfectamente, pero claro, el XBMC esta optimizado para pantallas digitales, y el texto en una TV tradicional se ve muy pequeño y delgado.
Sin tomar esto en cuenta, aproveché el “Airplay” para ver algunos vídeos desde el iPad, checar Navi-X y debo decir que estoy muy contento con el milagroso aparato. Es cierto, no es perfecto: un par de veces se trabo y hubo que “resetearlo”, y el tener que usar un teclado usb (tengo uno inalambrico, que por lo menos es mas cómodo) funciona y responde decentemente. Me imagino que la versión 5, muy pronta a salir según la pagina de RaspBMC, tendrá la implementación del modo turbo por lo que espero que iguale la velocidad del AppleTV2, y sea un duro contendiente.
Mientras tanto voy a disfrutar de este excelente aparato en mi vieja televisión, y seguir reportando éxitos.
espero sus comentarios.